Tag Archives: easy

Banh mi at home

My brother has said that I eat like a trucker, and when it comes to this particular sandwich that is probably accurate…

Even though I made them on Saturday night for fun, and even though Alistair’s birthday was only two days later, he still begged for banh mi for his birthday. As I like to be obliging about birthday dinner, and because banh mi are definitely high on my list of most delicious foods, I didn’t need any convincing to make them again. I would happily eat banh mi three times a week! So we had sticky pork banh mi two times in three days.

You might ask (especially if you live in Seattle) why would anyone make banh mi when you can get quite a decent one in the ID for $3? Yes, banh mi are practically a dime a dozen and yes, almost anyone I ask has their very favorite banh mi spot, but it doesn’t matter. I still love to make these little sandwiches at home. Homemade, the daikon and carrot pickle is tangier and crunchier, the meat more tender and caramelized, warm from the grill with glistening charred and sticky edges, and the herbs and greens are so crisp it might seem they are speaking directly to you in Vietnamese. Also, since nobody expects homemade banh mi – they’re such a takeout item – I love to surprise people by making my own.

Caramelized Pork Banh Mi serves 4 generously

Caramelized pork

  • (2) 3/4 lb pork tenderloins, sliced to 1/4″ thick on the diagonal
  • 1/4 c. sugar
  • 1/2 c. water
  • 4-5 tbsp warm water
  • 2 tsp Nước chấm (fish sauce)
  • 2 tsp soy sauce
  • 2 plump shallots, chopped and mashed in a mortar and pestle, or minced fine
  1. In a small heavy duty saucepan, combine the water and sugar over medium high heat. Simmer for about 15 minutes, or until the syrup has caramelized and is the color of an old penny – a rich deep reddish brown, not burnt though. You’ll know by the scent.
  2. Add 4 or 5 tbsp warm water – stand back a little! It will spatter and spit. Set aside to cool.
  3. When cool, put the caramel in a medium sized bowl and add the Nước chấm, soy and shallots.
  4. Start the grill.
  5. 20 minutes before you plan to start grilling the meat, toss the pork in the marinade and leave on the counter.
  6. Over hot coals or a with the gas set on high, grill the pork for 2 minutes on each side. As the slices come off the grill, stack them on a warm platter.

Daikon and Carrot Pickle

  • 1 fat daikon radish, peeled and trimmed
  • 2-3 medium carrots, peeled and trimmed
  • 1/2 cup + 2 tsp sugar
  • 1 tsp salt
  • 1 1/4 c. white vinegar
  • 1 c. warm tap water
  1. If you love to julienne vegetables, go for it and cut the daikon and carrot into  3/32″ matchsticks. I used to do that. Now I use the fat grater attachment on my food processor. 
  2. Put the julienned or grated daikon and carrot in a colander and set it in the sink. Toss the carrot and daikon with 2 tsp of sugar and 1 tsp of salt. Let them sit for 10 or 15 minutes. Then rinse and shake the excess water out.
  3. Dissolve the sugar in the warm tap water and add the vinegar. Toss in the rinsed carrot and daikon and refrigerate until ready to use. This will keep covered in your fridge for a week.
To assemble you’ll need:
  • mayonnaise
  • Two good handfuls of washed cilantro leaves
  • shredded romaine
  • sliced green chili – jalapeño or serrano
  • 2 crisp baguettes (not too chewy!!), sliced into 6 -8″ lengths on the diagonal
  1. Slice the baguette down the length to make a long sandwich.
  2. Spread the bread with mayonnaise.
  3. In this order, stack sliced pork, romaine, carrot-daikon pickle, cilantro and sliced chili. They’re done!
There are people who might quibble that I didn’t include pate, much less head cheese, vietnamese sausage or braised pork belly. Knock yourself out – if that’s what you like. However, this pork is so sticky and smokily perfumed – it’s all I want.

Birthday Cake

I’m trying to write about Leo’s birthday cake and what I’m finding is, I don’t really care about making cake as much as I used to.

However…this is such a great cake! So I’m sharing anyway. We all need a recipe as reliably lovely as this one. A  pure and plain expression of the ideal; the crumb sweetly, tenderly vanilla and so delicate. And still there is structure! Not many cakes strike that balance. Not only that, but a person who has baked nothing more than a brownie could easily whip this one out. I promise.

I know, I know. Too bad the frosting had to be blue. Not my choice.

What Leo said was “I want a white cake, vanilla, with blue frosting, also vanilla, covered with gum drops.”

I smiled at him, he’s so adorable, but I know this: he’ll take two bites, tops! No offense Leo. Food should not be blue. Not even cake. And hey! Are you really a vanilla/vanilla kid?! What’s with the gumdrops? Have you ever really eaten a gumdrop? Don’t you know they don’t taste very good?

It used to be that with birthday cakes, I would veer deeply into Martha territory but now that is in my past. I am finished with complicated. Plain and delicious is what I’m after. No fancy tricks or techniques. Who needs to prove they can make an Italian meringue or French buttercream? Not me. Kids like the butter and powdered sugar version better anyway and I want Leo to like his cake. Also, I want to like his cake. Like making it, like eating it. And this cake delivers all that.

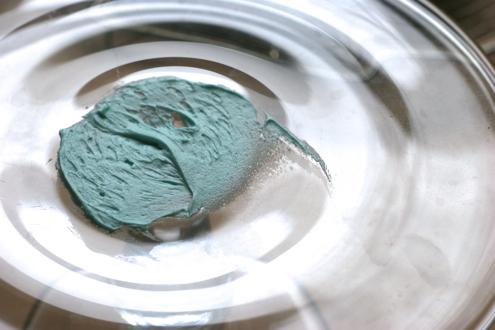
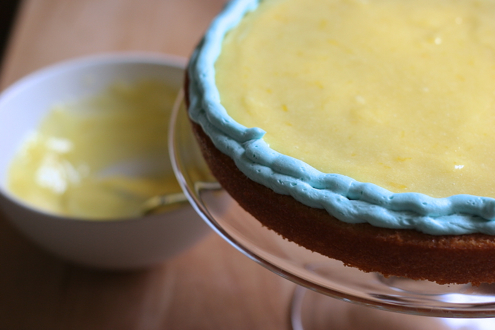
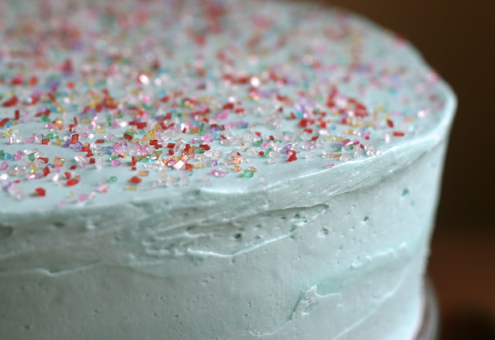
As I couldn’t handle the gumdrops, I substituted India Tree Sparkling Sugar Confetti  but I did dye the frosting blue, against my better judgement. And then I broke out a secret weapon: Lemon curd. Leo loves lemons but he’s never had lemon curd.

He totally loved his birthday cake – he even ate a whole slice! I loved it too. My favorite birthday cake in years.

Although…blue frosting?

The Essential White Cake

Pay attention to the temperature of the ingredients – all dairy and eggs should be at room temperature.

  • 2 1/4 c. cake flour
  • 1 c. whole milk, at room temperature
  • 6 large egg whites, at room temperature (save 4 of the yolk for the lemon curd)
  • 1 tbsp vanilla extract
  • 1 3/4 c. granulated sugar
  • 4 tsp. baking powder
  • 1 tsp. table salt
  • 12 tbsp unsalted butter (1 1/2 sticks), softened, this is best done by removing the butter from the fridge to the counter when you wake up in the morning
1. Set oven racks in upper-middle and lower-middle positions. Preheat oven to 350 degrees.
2. Spray two 9-inch round cake pans with nonstick cooking spray (I used olive oil as it’s all I had and it was fine) and line the bottoms with parchment rounds. Then, spray the rounds, and dust the pans with flour. Flip the pans over and tap them firmly over the sink to remove any excess flour.

3. Pour the milk, egg whites, and vanilla into 2-cup liquid measuring cup and mix with fork until blended.

4. In the bowl of an electric mixer, using the paddle attachment, mix cake flour, sugar, baking powder, and salt at slow speed.
5. Add butter; continue beating slowly until mixture looks like moist crumbs, with no floury streaks remaining.
6. Add all but 1/2 cup of milk mixture to the buttery crumbs and beat together at medium speed for 1 1/2 minutes. Add the rest of the milk mixture and beat  for 30 seconds. Stop mixer and scrape sides of bowl.
7. Beat at medium speed for 20 seconds longer. The batter will look slightly curdled.
8. Divide batter evenly between the two cake pans. With a rubber spatula, spread batter out evenly over the pans. Place pans on separate racks in staggered fashion to allow air to circulate. Bake  for 23-25 minutes. A thin skewer or toothpick poked into the center should come out clean.
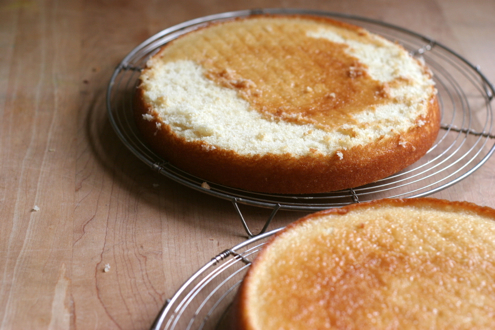
9. Rest the cakes in pans for 3 minutes. Using a small sharp knife, loosen from sides of then invert onto wire racks. Reinvert onto additional wire racks.
10. Cool completely, at least 1 1/2 hours.
Lemon Curd
  • 4 egg yolks
  • 1/2 cup + 2 tbsp sugar
  • 3 fluid ounces of lemon juice
  • 4 tbsp soft unsalted butter
  • the zest of an unwaxed lemon, finely shredded with a microplane grater
1. In a stainless steel or enameled cast iron saucepan, whisk the egg yolks with the sugar until creamy and smoothly blended.
2. Stir in the sugar, lemon juice and butter.
3. Stir over medium low heat, until thickened, so that it thickly coats the back of a spoon – draw your finger through the curd to see if it can hold that line. It should still be pourable.
4. Do NOT boil the curd as then you will have made oddly sweet, lemon-y, scrambled eggs. As soon the mixture has thickened, pour through a fine strainer and press  through with your spoon.
5. Stir in the lemon zest and cool. The curd will thicken significantly upon cooling.
6. To fill a 9″ cake you will need  1 cup of the curd. But if I were you I would steal a couple of spoonfuls before filling the cake.
Easy American Buttercream
You could find a buttercream recipe in any book, they’re all about the same. However, you will have to decide how stiff you want the frosting. Add a lot of powdered sugar and the frosting will hold a stiff little star piped obsessively from your piping bag. (Old habits die hard I guess!) Next time, I’ll use less sugar for a swoopier and creamier frosting!  If you are looking for a tutorial on how to frost a cake, look no further than here. Building the dam was life cake changing!
  • 2 cups unsalted butter, softened at room temperature for at least 2 hours
  • 6-8 cups powdered sugar, please sift it!
  • 1/2 tsp salt, fine table salt – not kosher
  • 2 tbsp vanilla
  • 2-4 tbsp milk
  • food coloring (optional)
1. Beat the butter on medium speed with the paddle attachment until it’s broken down into glossy peaks.
2. Add three cups of the powdered sugar and carefully restart the mixer on low. (start quickly and you and your kitchen will be covered in sugar) Beat until all the sugar has been incorporated
3. Add the vanilla, salt and and milk, then increase the speed to medium and beat for 3 minutes. Add the food coloring, if using.
You can add more sugar if you want a stiff consistency, but in my opinion, you will end up with a powdery mouth-feel and it doesn’t taste as good. It’s your choice. I think the frosting stars around the edge of my cake wouldn’t have looked so prissy, if I’d used less powdered sugar…
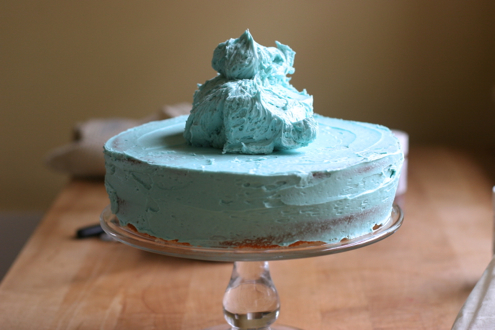
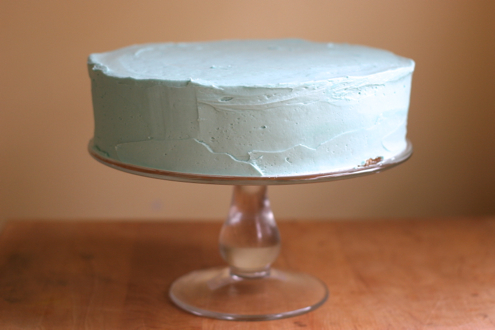
Here are a few photos on assembling the cake:

It looks sloppy before you frost, but leveling the cake is important

A tablespoon of frosting will help adhere the cake to the stand - no slipping!

Why did I not know about the dam before now!?

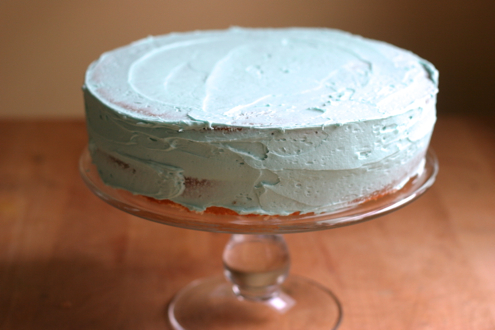
The crumb coat - don't skip this step!

Crumbs contained

It sure seems like a lot of frosting

Smooth and ready for sprinkles

First sprinkles, then piping

I laughed. I cried. I ate a lot of biscuits.

There are people who expect biscuits alongside their dinner and then there is everyone else.

We were not biscuit eaters growing up. We were popover people. We also had a thing for Yorkshire pudding.  There are good reasons to love popovers. You don’t need to worry about over-handling the dough (as with biscuits) or about yeast and timing as you might with dinner rolls. Popovers are so easy to throw together, as well as being rather elegant – why branch out? In comparison, I always imagined biscuits to be a little doughy and there is a mythology about what type of flour to use and dough handling that seems somewhat opaque. (I must confess that my only real biscuit eating experience came from sporadic visits to Kentucky Fried Chicken – perhaps not the ideal place to form an opinion.) Also, culturally, they belong in the south and we are decidedly not southern. Regularly making biscuits here in Seattle would make about as much sense as nicknaming your son Bubba. Aren’t biscuits a regional speciality? Something to dabble with when serving ham or catfish? We served ham with scalloped potatoes. Biscuits were never a consideration.

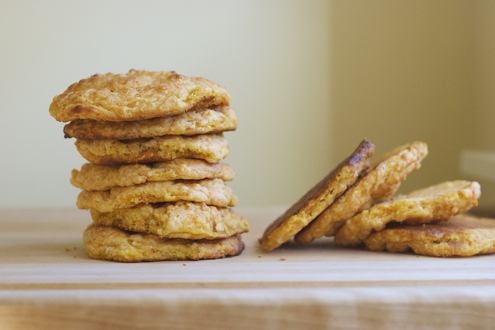
And then my friend Alicia sent me that book I told you about, Screen Doors and Sweet Tea, and all my carefully formed opinions (some might say biases) went flying out the window. I’m still not sure what inspired me to make Sweet Potato Biscuits. We don’t even eat sweet potatoes that often so it wasn’t like I had a lonely sweet potato sitting on the counter. Perhaps it was the photograph. Anyway, since last week I have made the Sweet Potato Biscuits four times! Actually, since I doubled the recipe three of those times, it might mean that I have made them seven times this week!

It was not a week without troubles. While the dough was gorgeous, flecked deep orange and webbed with airy bubbles, the biscuits did not always rise as high as I hoped they would, although the first batch was reasonable. That batch rose to a height of about 3/4 of an inch. Still, I felt they could be better. The next try, the biscuits turned out distinctly and disappointingly flat.  See below.

Ridiculously flat. They were edible - but only just.

I wondered if it was because at Trader Joe’s the yams were masquerading as sweet potatoes. (I knew from the beginning they were really yams but had forged ahead anyway) Or, was it because I simply don’t have the mythic Southern touch?!

I went out and bought a real pale fleshed sweet potato and this time they were about 3/4 of an inch again, but still no better than the first batch I made originally with yams. However, despite all my troubles with flat or flat-ish biscuits, I couldn’t walk away. Sweetly tender, enriched by the vivid starchy mash, these biscuits had such possibilities! If I could get them to rise just a little higher, the sky would be the limit, so to speak. Imagine adding a little crumbled bacon, or fried sage leaves? What about some chopped chili? Could there be a place for andouille sausage? Fried crisp and crumbled into the dough? How about a little candied ginger?…but that would have to wait. First I would have to find the right recipe.

I found recipes by Paula Deen and Southern Cooking (obviously), and Martha Stewart, but finally settled on one from Chow.com.  All the recipes looked excellent and from them I gleaned that everyone has trouble getting Sweet Potato Biscuits to rise as high as the plain kind. Some added baking soda in addition to the baking powder. Some used buttermilk. Most added more flour than called for in my original recipe. Many advised to make roll out biscuits as opposed to the drop kind, opining that if they were packed a little closer together they would lift and stabilize each other. The discussion sounded so Southern. Because there was a cup of leftover mashed sweet potato in my refrigerator from the last experiment, I got started right away.

30 minutes later: Success! Part of the fun of biscuits is that they are actually quite easy to whip up and this recipe doesn’t require hard-to-find White Lily or Southern Biscuit Flour – the traditional choice for Southern biscuit makers. When it comes time to knead, back off a little. This dough needs no man-handling. Just work on a well floured board. Initially, I made these to go with a beautiful baked ham but now, my family imagines that they go with everything. Although maybe not Chinese food or pizza…

Sweet Potato Biscuits (minimally adapted from Chow.com)

Imagine making a tiny version with chutney and sharp white cheddar to go with cocktails….

  • 2 cups all-purpose flour
  • 1 tablespoon baking powder
  • 1 tablespoon granulated sugar
  • 1/2 teaspoon fine salt
  • 1/4 teaspoon baking soda
  • 3/4 cup buttermilk or 3/4 cup whole milk + 1 tbsp cider vinegar
  • 1 cup baked, mashed sweet potato (about 1 medium potato) or yam
  • 8 tablespoons unsalted butter (1 stick), frozen
  • Heavy cream, for brushing the tops

  1. Preheat the oven to 400°F  with the rack set in the middle of the oven.
  2.  Using a large mixing bowl, whisk together all the dry ingredients.
  3.  In a medium sized bowl, whisk the buttermilk and sweet potato together until smooth.
  4. Using the largest holes in a box grater, grate the frozen butter. Toss with dry ingredients until butter is evenly dispersed through the flour.
  5. Pour in the buttermilk and sweet potatoes. Mix lightly until dough forms a shaggy mass.
  6. Flour the counter and turn out the dough. Knead gently – for about 30 seconds, – just until the dough hangs together. It will still be sort of shaggy.
  7. Pat into a circle  with floured hands to a thickness of about 3/4 inch. Using a biscuit cutter or a drinking glass, cut the dough into rounds.  Push the scraps together again and cut out the rest. Discard the rest of the dough as too much handling makes for tough biscuits.
  8. Put a piece of parchment on a baking sheet. Place the biscuits on top and brush them with heavy cream.
  9. Bake until golden brown, about 12 to 15 minutes.
To roast a sweet potato or yam for use in this recipe, set the oven to 375. Place either one large or two medium sweet potatoes on a baking sheet and roast for 40 minutes or so – until very soft. Cool, mash, and get started.

Now that that’s taken care of I will go make myself a ham and fried egg sandwich on a warm sweet potato biscuit…

For more on traditional biscuit making see this article.

What To Eat for Christmas Dinner – in plenty of time for next year. Sigh.

Better late than never? I hope so. I almost survived Christmas. I could not finagle a single minute to write even a little line or take one yellow-cast nighttime photo. Oh well, I can’t stand those dim candlelit dinner photos anyway.

Right now, I am hunkering down on the couch with a blanket and my laptop. Outside it is neither bright and crisply cold nor white with snow. My hand is deep in one of the many little bags of cookies my sister dropped off for Christmas. You would not believe it. Cardamom horns, chocolate nib shortbreads, chocolate sparklers, chewy ginger cookies, teeny tiny chocolate marshmallows AND (!!!) pecan chocolate dipped butter toffee. They are so gorgeously packed up – each in its own small cellophane bag with a little printed label. I should have taken a picture. (I would accuse her of showboating but I could never jeopardize her taking me off her delivery list!!! Yes. They are that good. I may have to make her write a guest post sometime in November 2013.) I digress. I am so wiped out by Christmas I can barely move. I am just sitting around eating cookies, contemplating how on earth I can get up the energy to make something decent for dinner for the ravenous hoards. (aka my children)

Part of the reason for this slothfulness is that the weather is so particularly Seattle-ish. The mercury hovers around 40 during the day, dipping down to within 3 or 4 degrees of freezing at night. I am dying for a little snow but this will not be the year for it. It’s bleak, that’s what it is. A good time for a nap on the couch, slipping in and out of sleep with a good book. Like a cookbook. I have two new ones here, which are making for a fine escape from this dreary weather. Ottolenghi’s Jerusalem, so warmly Mediterranean and  Screen Doors And Sweet Tea, a gift from my very dear friend Alicia. I’m making the Sweet Potato Biscuits for a party tomorrow, New Year’s Day, to go with baked ham and scallopped potatoes and, for tonight, the open kibbeh pie from Jerusalem. Well actually my neighbor is making the pie. But I will be eating it! With a spinach salad with dates and almonds from the same book. Toasting for peace in the Middle East on New Year’s Eve! (and celebrating my newest Ottolenghi cookbook – naturally!)

Even though the recipes are shockingly late, please give my Christmas dinner a try anyway. It would make for a thrilling Valentine’s Day dinner party. In those carvery-sort of restaurants where you often find a French dip sandwich, every component is mediocre. Often, you get some sort of feed lot slab of beef, a salty chemical jus from a jug, a limp roll, maybe slightly stale. Certainly no onion jam. And they aren’t buttering that bread with French butter. I bought my tenderloin at Rainshadow Meats, my local butcher, so I know it’s responsibly sourced. I caramelized onions for an onion jam. I made crème fraîche and swirled in a little horseradish. Even though nearly every method for French dip online calls for canned beef broth, I made my own. The seasonings on the beef might seem unusual. Fennel veers away from your run-of-the-mill French dip. Be brave! The delicate licorice notes only add to more usual thyme and black pepper! It is not a misstep or excessive in any way. None of the parts of this sandwich take much in the way of time, skill or effort. The work is minimal considering many people consider Christmas dinner to be the highpoint of the year. This small amount of work pays off in a big way.

The sandwich photos were taken the day after Christmas, without jus, as we’d dipped it all up the previous day. The leftover French dip lost nothing overnight. We hardly missed dunking into hot peppery broth.

Top Shelf French Dip Sandwiches – for 8, with leftovers

The Components:

The day before Christmas:

Season the Beef (somewhat adapted from this recipe from Fine Cooking)

  • 4 Tbs. extra-virgin olive oil
  • 4 Tbs. finely chopped fresh thyme
  • 2 Tbs. ground fennel seed
  • 2 tbsp Kosher salt
  • Freshly cracked black pepper
  • (1) 4 pound beef tenderloin, trimmed and tied. If the roast includes the tapered end of the roast, fold it under and tie it in place so that the roast is the same diameter for the entire length
  1. Dry the tenderloin with paper towels. Combine the olive oil, thyme, fennel seed, salt and pepper and rub all over the tenderloin. If you can do this the day before and keep the roast lightly covered in parchment in the refrigerator overnight, so much the better.

Crème fraîche

  • 2 cups heavy cream
  • 1/4 cup buttermilk
  1. Whisk cream and buttermilk together in a heavy medium sized bowl.
  2. Cover with plastic wrap.
  3. Set in a warm spot for 24 hours.
  4. If the cream doesn’t thicken, it probably wasn’t warm enough. You can set the cream in a warmer spot for a further 24 hours. I set mine on top of the stove as we were baking in the oven below at 475. It worked perfectly. The following morning the cream was very thick.
On Christmas Day, starting about 2 hours before you want to eat dinner, make:

Jus

  • 6 cups veal stock
  • 1 tbsp soy sauce or Worcestershire
  • splash of sherry
  • sea salt and plenty of freshly ground black pepper
  1. Reduce veal stock by half over medium high heat
  2. Add soy sauce or Worcestershire, sherry and salt and pepper to taste.
  3. Keep warm over low heat.
Roast the Beef Tenderloin 
  1. Remove the beef from the refrigerator and let sit at room temperature for an hour before roasting.
  2. Half an hour before you want to start the beef, preheat the oven to 375°F.
  3. Place the tenderloin on a wire rack on a large rimmed baking sheet.
  4. Roast to 130°F for medium rare, or 135°F for medium, 40 to 50 minutes.  I recommend a digital oven thermometer so you can plug it in and walk away. There is enough going on at Christmas without having to worry about whether you are over cooking the roast or not.
  5. When the roast has reached temperature, allow to rest uncovered on a carving board for 10 minutes. Slice very thinly. (Make sure all the other ingredients are prepped before you start! Don’t let the meat  get cold)

Horseradish Cream

  • 1 cup crème fraîche
  • several tablespoons prepared horseradish, newly opened
Whisk horseradish into crème fraîche to taste. Refrigerate or serve immediately.

16 good quality sandwich rolls

  1. Preheat the oven to 200.
  2. Wrap rolls tightly in foil and warm in the oven for 15 minutes.
  3. Slice in half for sandwiches.

To assemble:

  1. Spread the warm rolls with unsalted French butter on both sides.
  2. After the meat has rested for at least 10 minutes, slice it as thinly as you can with your sharpest carving knife. I have one called Schinkenmesser (it means ham slicer) and it is nicely flexible and carves beautifully.
  3. Pile many slices onto each sandwich – you will have to judge how much. I would say at least 10 slices per sandwich for the grown-ups.
  4. On top of the meat spread 2 or 3 tablespoons of the caramelized onions. And on top of that, 2 or 3 tablespoons of horseradish cream.
  5. Serve with about 1/2 a cup of steaming jus in a small ramekin on the side.

These sandwiches are excessive in every way. Even so, people will eat seconds. It is quite possible that dessert will get the short shrift.

Panna Cotta

This is my idea of the perfect dessert. It is elegant. It is understated. It is not too sweet. It isn’t dependent on the season and yet all kinds of seasonal fruit goes with it and that makes it versatile. From strawberries in June, plums in September, precisely cut little blood orange sections in December to rhubarb compote in March, they all marry beautifully with panna cotta. Plain, it is the essence of pure clean cream. It is ideal for dinner parties of up to 12 people because you must make it in advance so there is no last minute horsing around. Utterly creamy, it is the most beautiful pale ivory color, I am trying to think of a dessert I like better and I can’t. (Well, there is that roasted tangerine tart thing…and the pear custard with chocolate…oh and the fresh strawberry ice cream with brown sugar cookies. Nevermind.) Anyway. Panna Cotta is one of my supreme favorites and I can’t believe I haven’t written about it until now.

With rhubarb and strawberry compote

The first time I had panna cotta was in a dark cistern of a restaurant in Florence, following a wide soup plate of ribollita. A frutti di bosco puree swirled around the base. That one was good enough to start a bit of an obsession. For the next several years, if I saw panna cotta on the menu, I always ordered it for dessert. Sometimes it was dreamy, barely set, just sweetened cream, served with fruit or a tuile, or sometimes, weirdly, with chocolate. Occasionally there was too much gelatin and that was a disaster! Like rubber. Finally, in a little restaurant in the Mission in San Francisco, after a plate of very tender charred squid and a bowl of boar bolognese and tagliatelle, I had a panna cotta epiphany. Here on a little white plate, was the epitome of the the dessert. It’s highest manifestation. I’m only sort of kidding.

In a puddle of clear caramelized sugar, just burnt enough to be intriguing, a pale quiver of cream. Sections of blood orange were scattered at the edge; their membranes carefully sliced away. Luckily, SFGate published a recipe for the dessert soon after or I would still be pining for it here in Seattle.

I made this panna cotta on Monday for a dinner party I gave my dad as a present. I served it with a blueberry compote scented with lemon. (If you like to cook, it makes a great gift to give someone an entire dinner party. Loads of fun.)

Delfina Buttermilk Panna Cotta

Caramel

  • 1 1/4 cups sugar
  • Juice of 1/2 lemon
  • a little water + 1/4 cup of water
Panna Cotta
  • 1 envelope gelatin (about 1 tablespoon)
  • 3 cups whipping cream
  • 1 1/4 cups + 2 tablespoons sugar
  • 1 cup buttermilk
  • Juice of 2 lemons

Caramel - the color of an old penny

  1. To make the caramel: In a small heavy bottomed saucepan, combine the sugar and lemon juice.
  2. Add just enough water to moisten to a sandy texture.
  3. Using a pastry brush dipped in water, brush any sugar off the sides of the pot. This will help you avoid crystalizing the sugar. Don’t worry too much about this, I have accidentally crystalized sugar in other recipes, but never in this one.
  4. Cook over medium- high heat until the sugar caramelizes. The color should be as deep a copper as an old penny.  Getting the color right will ensure rich flavor. Just don’t burn it!
  5. Remove from heat and stand back while you add the 1/4 cup water. Don’t get spattered! The hot caramel will sputter like crazy when you add the water.
  6. When the sputtering stops, pour the caramel into a dozen little ramekins. Mine are 6 ounce and I got them at IKEA .Carefully tilt the cups to coat with caramel. Set aside.
  7. To make the custard: Empty the package of gelatin into a small bowl. Stir in 4 tbsp of water and stir. Set aside.
  8. Add the cream and sugar to a medium heavy bottomed saucepan and whisk. Heat until there are bubbles all around the edges but remove from the heat before it reaches a rolling boil. Stir in the softened gelatin and whisk until it dissolves completely. Add the buttermilk and lemon juice and whisk briefly until combined. Remove from heat and let cool.
  9. Pour the custard into the ramekins, over the caramel. Refrigerate overnight.
  10. To unmold:  Fill a small baking dish with very hot tap water. Working methodically, slip a small sharp paring knife around the inside of the molds to loosen the custards and set in the hot water for a about 10 seconds. Invert ramekin over a serving plate and whack it gently.  It should slide gently onto the plate, surrounded by a pool of caramel.
  11. Spoon a little blueberry compote around the edge.

Blueberry Compote

  • 2 cups blueberries, fresh or frozen if you must
  • 1/3-1/2 c. sugar (sometimes frozen berries are very tart)
  • grated zest from 1 lemon
  • 2 tbsp water (if using fresh berries)
  • 1 tsp. cornstarch
  • 2 tbsp lemon juice
  1. Stir the blueberries, sugar, lemon zest and water (if using) in a small saucepan. Heat until liquidy and the blueberries soften.
  2. In a small bowl, add the cornstarch to the lemon juice and stir until smooth. Scrape into the blueberry mixture. Stir and heat just until the berries reach a boil.
  3. Cool a little bit before serving. The contrast between the warm berries and the cool panna cotta is pleasing.

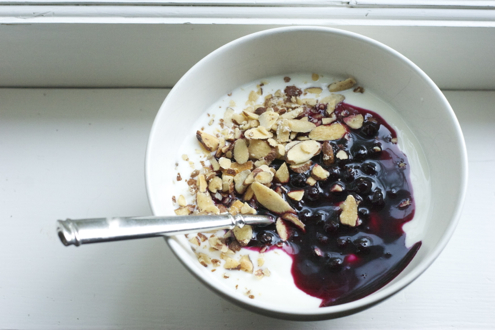
Leftover blueberry compote with yogurt and toasted almonds makes an excellent breakfast

I did have panna cotta last week at a sushi place here in Seattle. (Take note – this might be the best sushi I’ve ever had!) Anyway for dessert, they served Panna Cotta with a clear yuzu sauce. Fantastic.

Swiss Chard

I’m writing this from the car in the corner of the parking lot at the soccer field. My kids got a weird combination of Cliff bars, macaroni and cheese, carrot sticks and apple slices for dinner tonight, depending on where they were going and what they were doing. Last night was slightly better.

I have been missing making dinner but I didn’t know how much until I got out my big sauté pan. The way it clangs as I drag it over the iron grate on the stove – I love that sound. My black apron with the orange pig embroidered on the bib has been hanging limply on its peg for weeks. I wrap the long strings twice around my waist then tie them in a bow in front. On the table is a heap of chard, rainbow stems poking out from the wide green leaves, papery garlic, a bottle of aged vinegar with a tiny cork on top, a tall slim green bottle of olive oil and a little prep bowl of dried chili.

I roll up my sleeves. Set the heat to medium high. Then peel and slice a couple of cloves of garlic. Swing an open bottle of green olive oil in a wide circle over the hot pan. A good pinch of dried chili, rough on my fingertips and stinging them a little bit. The garlic goes in then there’s the sizzle and the scent. Don’t let the pan get too hot. In about a minute the garlic slowly becomes golden, molten and then the air is charged with it. I lift a mountain of wet ribbons of rainbow chard and heap them in, up and over the edge of the pan. Turned with a wooden spoon, over and over. They settle down and soften. Pop the lid on and turn down the heat. In ten minutes with a few tosses and turns, they’re nearly done. A splash of sherry vinegar or balsamic vinegar, a little softened butter and a generous pinch of sea salt. Finished. 12 minutes worth of work.

I am not sure why making chard this way is so gratifying. It just is.

 Sautéed Swiss Chard 

  • 2 bunches Swiss Chard
  • 2 cloves garlic
  • 2 tbsp olive oil
  • pinch of red chili flakes
  • sherry or balsamic vinegar
  • softened unsalted butter
  • sea salt
  1.  Wash the chard carefully and slice into 1” ribbons. Do not dry it.
  2. Heat a 12” sauté pan over medium heat heat while you peel the 2 cloves of garlic and slice them thinly.
  3. Pour the olive oil over the pan. It should shimmer immediately.
  4. Add the chili and the garlic. Stir until the garlic is deeply golden. Don’t burn it whatever you do. Brown garlic is bitter and not in a good way.
  5. When the garlic is golden, add the chard. Toss until it settles down a little and is coated with the olive oil. Clamp a lid on top, turn down the heat and wait 5 minutes.
  6. Take a peek and toss it. Does it look dry? Add a tablespoon or two of water. Stir and clamp down the lid again. In five minutes the chard should be tender.
  7. Remove the lid and toss in the butter. Sprinkle about a tablespoon of vinegar over the top. Season with salt to taste – I think about 1/2 a teaspoon should do the trick.

I didn’t write about the kalbi skewers I picked up at the grocery store. Or the nice but bland jasmine rice on the side. There wasn’t much to say about this dinner, but after weeks of bland quick cooking before soccer practice, that little hit of hot garlic was so satisfying.

A Perfect Day for Gazpacho

I am on vacation. If you have been reading this blog for awhile, you know that I usually take the summers off. This is never intentional. Summer should be the best time of year for writing about food and as I spend a good part of the summer in California, I have tons to write about. So, today I am up at 6:00, the sun just burning through the early morning fog. Everyone is still asleep so I can sort through photos, tap away on the keyboard, sip a large bowl of cafe au lait and write in peace! Through the open window, I think I hear an owl. When I look up, the valley is barely visible through the twisted branches of the live oaks outside. It is cool up here in the front bedroom with the breeze blowing through the open windows. Nothing like how hot it will be by noon. In a couple of hours, I’ll drive down the road to the farm in San Martin so we can have gazpacho for lunch. There, the tomatoes almost burst in the heat, the cucumbers staked under their their wide green leaves are crisp and cool, and the air is spicy with garlic.

There are two ways to make gazpacho. You can hand chop the vegetables or you can puree them in a blender. Hand chopping vegetables into precise smithereens seems like a waste of time on a blisteringly hot day, when the tomatoes are perfect for gazpacho. On hot days, you shouldn’t have to work too hard just to make a little lunch. This is why you have a blender.

Gazpacho – serves 10

  • 1 cup tomato juice
  • 1 (2-inch) piece baguette or if you don’t have any on hand (I didn’t) 1 slice of any kind of sandwich bread, crusts removed
  • 15 very ripe medium tomatoes, coarsely chopped
  • 1 1/2 medium English cucumbers, peeled and roughly chopped
  • 3 cloves garlic, roughly chopped
  • 2 1/4 teaspoons kosher salt
  • 2 teaspoons Spanish smoked paprika (smoked paprika has gone so mainstream they even sell it at Trader Joe’s!)
  • 1/4 cup sherry vinegar
  • 1 cup extra-virgin olive oil
  1. In a blender, soak bread in tomato juice for 15 minutes.
  2. Blend until smooth.
  3. Add tomatoes, cucumbers, garlic, salt, and smoked paprika. Blend again until smooth.
  4. With motor running, slowly add the vinegar, then the olive oil.
  5. If you have the patience, chill for 4 hours, then serve. I had a bowl right away with an ice cube in it, and then another bowl 4 hours later.
The Garnish
  • 1/2 cucumber, finely diced
  • 1/2 red bell pepper, finely diced
  • 1/2 small red onion, finely diced
  • 1 tsp sherry vinegar
  • 1 tbsp extra-virgin olive oil
  • 1/4 tsp kosher sea salt
  • 1/8 teaspoon freshly ground black pepper
  1. In medium bowl, toss together all ingredients.
  2. Ladle gazpacho into bowls.
  3. Spoon chopped vegetable mixture into middle of each bowl, dividing evenly among bowls. Serve immediately.

Leftovers can be kept in the fridge for 2 days.

Eggs: Lime Saffron Aioli, Champagne Sabayon and Duck Eggs. Not all at once, obviously.

Here are some true things about me and eggs.

  1. I had to eat an egg in some form every single day before school when I was growing up.
  2. We were a mayonnaise eating family, we made our own, and, we kept it on the counter for a week. (If there was any left. Often there wasn’t.) I could make mayonnaise by the time I was 10. In a blender. Mayonnaise is a raw egg based sauce – in case you aren’t familiar with how you make it.
  3. Deviled eggs are a particular weakness of mine and my sister’s. My uncle makes loads of them for the annual Christmas party and we park ourselves right by the tray and shamelessly pop them in our mouths until they are gone. You make deviled eggs with mayonnaise.
  4. One of the best desserts I ever had was at a little bistro in the Village in New York.  I can’t remember what was for dinner at all, but the warm sabayon with fresh tiny wild berries was like…I really hate to write stuff like angel’s nectar but there really is no other way to describe that ethereal nearly white cloud of beaten eggs and champagne. Of course I had to figure out how to make it at home.
  5. I find duck eggs to be delicious but a little bit freaky. They’re so huge.

I have been thinking about eggs a lot this weekend, as you might have guessed. Earlier this year, I wrote about Mary Alice and the amazing eggs she gets from Tender and  Nugget, her urban chickens. Well, on Friday morning she dropped by with a gorgeous basket of those eggs, a dozen, unwashed, just for me. And then, you’ll never believe this, my excellent neighbor Susan, went to the farmer’s market on Sunday and brought me half a dozen duck eggs.

Is there no end to my good fortune?!

This is what we made:

Sunday Night:

Lime and saffron aioli for grilled halibut with parsley, orange and shallot salad

Lemon Tart

Monday Night:

Poached duck eggs on toast with prosciutto, grilled asparagus, truffle oil butter and kosher sea salt (and yes I think the salt is important enough to mention)

Champagne Sabayon with Strawberries, Blueberries and Figs

I dream of dinners completed in half an hour and both the fish and the poached egg on toast fit the bill. And aren’t they so pretty? I’ve made the halibut before. I’ve made the poached egg before too. Poaching a duck egg is the same as a chicken egg – so that’s easy. Varying the halibut recipe is just adding a few ingredients to the mayonnaise recipe.

Lime Saffron Aioli

all ingredients should be at room temperature

  • 1 egg yolk
  • 2 tsp lime juice and the rind of the lime, removed with a rasp
  • 1/8 tsp kosher sea salt
  • 1 tsp hot water
  • 1 pinch of saffron
  • 1/2 small clove of garlic, grated
  • 3/4 cup mild oil, like canola


  1. Put the tsp of hot water in a tiny bowl with the saffron and leave to steep and cool. It’s such a small amount of water it will take no time.
  2. Whisk the egg yolk with the lime juice, salt, water and saffron and garlic until loose.
  3. Put the canola oil in a liquid measuring cup and as you whisk fiercely, drip the oil in very slowly, paying careful attention that it is completely incorporated before adding more. As the oil is incorporated, the mayonnaise should thicken into a silky looking sauce.
  4. As it thickens you can add the oil in a very thin stream, slightly faster than a drip.
  5. When all the oil is incorporated, the sauce should be glossy and supple and hold its shape softly when you dab at it with a spoon (Hopefully, you’re tasting your masterpiece!) Add the lime zest and taste for seasoning.

The parsley and orange salad is a cinch. Just use all the leaves from an entire bunch of parsley, the sections from two oranges carefully cut between the membranes and some of those thinly sliced shallots macerated in champagne vinegar. Add a little extra virgin olive oil, the reserved orange juice and some sea salt and you’re done.

Champagne Sabayon

Be careful to use a very large bowl for the double boiler. I should have used my large Pyrex mixing bowl. The sabayon foams up a lot – more than quadrupling its volume.

  • 4 egg yolks
  • 1/3 cup sugar
  • 3/4 cup champagne
  • 2 tbsp St. Germaine liqueur, optional
  1. Whisk the egg yolks and sugar together in the top of a double boiler set over boiling water.
  2. When the eggs and sugar are foamy, add the champagne. Whisk constantly for 10 minutes or use your electric hand mixer. That’s what I do.
  3. Remove from heat and stir in the St. Germaine.
  4. Serve warm in wide bowls with fresh beautifully ripe fruit.

I thought I would make this for the entire family for dessert but it turns out it tastes too “grown-up drink-ish” for kids. It didn’t matter. Martin and I piggishly ate almost the entire thing. I guess if I’m going to describe this as “angel’s nectar” I can say it was “heaven”.

I wonder what a deviled duck egg would taste like?! If I try one over the next few days I’ll let you know. I have three more.


Is THIS delicious enough?

I’ve cleaned up my act. Asparagus, arugula, beets, lima beans, salmon, plain yogurt, walnuts, blueberries, raspberries and cantaloupe and a dearth of processed grains have shaped my daily menu. Instead of veering wildly from starving myself to voracious bingeing on pear and custard pastries or salt and pepper potato chips I’ve made sure to consume responsibly in a measured and thoughtful fashion. (Although I have to confess, I was occasionally saved from some very poor choices by a square of dark chocolate.)

Then over the weekend I read this article by Mark Bittman. And I watched his little video and became obsessed. As you know, I am a slave to a rustic soup and this one was full of pork fat, cheese and olive oil. I know it’s not possible to detox on all that animal protein and fat, but is it possible to eat this kind of food in the midst of a detox and still be committed to detoxing?! For me, the metric has to be based on how delicious and flavorful the food is – which is a very personal way to measure! It seemed crazy to even try this soup, but…I just had to! Even the most thoughtfully prepared detox food can quickly become very boring!

In Mr. de Carlo’s “Bone Soup” there is a side of baby back pork ribs (it could have been any piece of meat with a large bone but the pork neck the butcher had was frozen in a solid lump and I wasn’t willing to wait for it to thaw). There is a lot of olive oil, not only in the soup, but on the soup and also gilding the deftly salted croutons which garnish the soup with bright raggedly torn leaves of basil. And how about the two big handfuls of parmesan cheese, in the soup – adding body and complex, savory, tang – and then even more thrown over the soup for good measure? This is what Mr. Bittman has to say about it:

But it’s worth pointing out, I think, that the soup is neither a fat-bomb (I wouldn’t be surprised if it has fewer calories than Olga’s) nor one that lacks complexity.

I am still trying to figure out how this soup is not a “fat-bomb”…

Olga’s method, as described by Mr. Bittman, is strikingly similar to this recipe I love from Alice Waters, which if you can refrain from adding cheese, is actually vegan. It’s very very healthy. And Mark Bittman says that this might have fewer calories than a vegetable soup made with water and olive oil…Hmmm.

I can’t wrap my head around it. Oh well. I will just trust Mark Bittman!

I felt compelled to make this soup as soon as I read the recipe and I would hate not to try something so clearly marvelous because of some silly detox “rules”. This is how to think about it: Bone Soup is a little vacation from the Detox. And like a really good vacation it will be revivifying, meditative, transporting and totally necessary. It is an entirely different sort of health transgression from pastry and potato chips.  The thing is, you can eat pretty much whatever you want on a diet if you set seriously high standards – this means only eat food that is truly delicious. Since Bone Soup takes five hours from start to finish there is no danger of eating that way everyday. I wouldn’t want to. Who would?! It’s too rich. It’s a maybe once a week vacation from the berries, melons, lettuces, yogurt and fish that I usually eat.

Save this complex and warming soup for a cold day. Like yesterday.

Bone and Black Chickpea Soup

slightly adapted from Frank de Carlo’s Black Chickpea Soup

  • 1 cup black dried chickpeas, soaked over night and then drained (next time I’m going with the yellow chickpeas, black chickpeas are good but much more firm than the yellow)
  • 3 tbsp olive oil + more for the croutons
  • 1 pound baby back pork ribs
  • 1 red onion, diced
  • 1 carrot diced
  • 2 stalks celery
  • 1 14 ounce can peeled plum tomatoes, drained if very liquid and chopped
  • a bay leaf
  • a few sprigs of thyme
  • 1/2 cup white wine
  • 1 pound rustic bread cut or torn in 1 1/2″ chunks
  • 1 cup chard leaves, washed and roughly shredded
  • 2 eggs
  • coarsely grated parmesan – about 3 cups
  • fresh basil leaves, washed, dried and torn into large pieces
  1. Over a medium flame, heat 3 tbsp olive oil in a 7 quart heavy stock pot or Dutch oven.  While the oil is heating, lightly season the meat with sea salt and freshly ground black pepper. When the oil is shimmering, start browning the meat. There should be a distinct sizzle but no smoke. If you happen to burn the fond (the delicious brown crispy stuff on the bottom of the pot, be sure to wipe it off before you continue to the next step or your soup will taste acrid.) The meat should be deeply browned on both sides but not burnt.
  2. After the meat is brown, add the tomatoes, bay, thyme sprigs, drained chickpeas, wine and enough water to cover everything by an inch. Cover the pot and bring the soup to a simmer over medium high heat. Then turn the heat to low, with the lid half way off. You can simmer for 3 – 5 hours.
  3. While the soup is simmering, take a moment to make the croutons. Heat the oven to 325. Toss the bread cubes in a bowl with some olive oil, 3 or 4 tablespoons and a pinch of sea salt. Bake on a rimmed baking sheet for about 10 minutes or until they are golden and crisp. Remove and set aside until ready to serve.
  4. When both the meat and the beans are fully cooked and tender, remove the meat to a cutting board and when it has cooled slightly, shred the meat and discard the bones, fat and gristle. Add the shredded meat back to the pot.
  5. Beat the two eggs together in a small bowl and then whisk into the soup. Whisk in 2 cups of the parmesan, and swirl in a little more olive oil
  6. To serve, ladle the soup into a wide soup plate or bowl. Garnish each with a few large croutons, another drizzle of olive oil, a sprinkling of parmesan cheese and several torn basil leaves.
Mr. de Carlo describes this soup as Umbrian. I don’t understand how this works exactly, but when I eat something like this, so complex and so distinctly of a certain place, it’s like being right there in Umbria just for those few moments you are eating. And for me that is reason enough to make this soup.


Delicious Detox Day 5 – A bit hungry

5:00 AM. Saturday morning. The sun is out for the first time in months and my bedroom is too bright. The birds are shrill. I’m pretty sure it wasn’t the sun or the birds though. I’m awake. Nobody else in my house is. I’m awake because I. Am. Starving.

I look over at Martin who is snoring softly. To my ear, incessantly. I think I might be able to go back to sleep, despite my growling stomach if only…I give him a quick kick. Just a little one. A stage whisper – You’re snoring! Roll over! He snorts and flips over muttering. I look at the clock. 5:07. Ugh. Too early to get up. I could sneak down to the living room with a book but I don’t. I’m too hungry.

After an eternity of tossing, I see that it is 5:55. Since it is so bright outside I wonder if there is any chance that this might be perceived as a reasonable time for a cup of coffee?! A latte would totally help. Ooh, and maybe a little sandwich! How early can I wake Martin? Maybe today I can wake him up pretty early. The sun is very bright and perhaps he’ll think it’s later than it really is…

I nudge him with my elbow and whisper – Hey, are you awake?! – He sighs then groans. – Wha?! Wha’s wrong?! –  I try to smile winningly at his closed eyes, hoping he’s peeking but he is totally fast asleep and me smiling isn’t helping at all.  Maybe I can hold out a little longer.

6:15 AM. I think this might be when the timer on our coffee maker starts the drip and the scent of coffee should start wafting up the stairs at any moment. The coffee could be ready in less than 5 minutes! I toss dramatically and sigh, yanking the covers in my direction. One of Martin’s eyes pops open. He stares at me blearily and then his eyes drift shut again. I think he read my mind. – The coffee doesn’t start until 6:45 on the weekends. So don’t look at me like that. – If he could roll his eyes he would, but his eyes are closed. I have to plead. – Oh please, I’m starving!– and I try smiling winningly again. No dice.

I think he can probably feel the intense beam of my gaze against his eyelids. – Sarah. My legs aren’t working yet, I can’t even move my arms. I am not ready to get up. You’ll have to make the coffee if you want it this early.

I am so desperately hungry though. Too hungry to make coffee. Too hungry to make toast. So I beg. He caves. Thank goodness!

Ten minutes later Martin returns, shaking his head, rolling his eyes, but he is carrying a tray. A steaming bowl of a latte scented with nutmeg and cinnamon, a tiny but excellent sandwich, sharp Italian cheese, bitter marmalade and butter – on this special bread Martin makes for Siri. It has spelt flour in it, and dried apricots and hazelnuts. This is such a marvelous breakfast. Especially if you have been over-zealously detoxing the previous day.

Blame my irrational behavior on extreme hunger please. There is no other explanation. And then, if you are taking the month off from any kind of crap bread, sugar, red meat and are finding yourself starving at inconvenient times, check out the following recipe. My cousin gave it to me. It is perfect for a healthy afternoon pick-me-up. I made it for a cocktail party this weekend and then immediately made another batch for me. Lima beans have a bad rap so don’t let them put you off. Lima Bean Pate is an herbaceous and lemony, gorgeously green spread for little crostini (for the kids, as almost no bread is delicious enough for Delicious Detox) or for crisp vegetable delivery devices – like celery, red and orange pepper or cucumber.  Lima Bean Pate can be ready in about 20 minutes – 15 of which is hands off.  It is the perfect afternoon snack. Very nice.

Lima Bean Pate

(adapted from The Lee Brothers Southern Cookbook)

  • 2 c. water
  • 1 tbsp kosher salt, plus more to taste
  • 2 c. frozen baby lima beans
  • 1/4 c. tightly packed fresh mint leaves (from about 6 stems), washed and dried
  • 1/4 c. tightly packed fresh flat-leaf parsley leaves (from about 6 stems), washed and dried
  • 2 tbsp  lowfat buttermilk
  • 1/4 c. olive oil
  • 1/4 c. lemon juice (from 1-2 lemons)
  • Freshly ground black pepper to taste
  1. In a small saucepan, bring the water and 2 teaspoons salt to a boil over high heat. Add the lima beans and let boil until just tender, about 12 minutes. Drain in a colander and rinse under cold running water for about 2 minutes to cool. Shake the colander several times to drain as much water from the beans as possible.
  2. Place the beans and the remaining ingredients in the bowl of a food processor and process to a smooth, thick puree, about three 30-second-long pulses. Between pulses, push any of the mixture that clings to the side of the processor toward the blade with a rubber spatula before pulsing again.
  3. Season the pate to taste with salt and pepper and transfer it from the processor to a small bowl or plastic container. Cover tightly, and store in the refrigerator until ready to use, not more than 3 days.