Iced Coffee

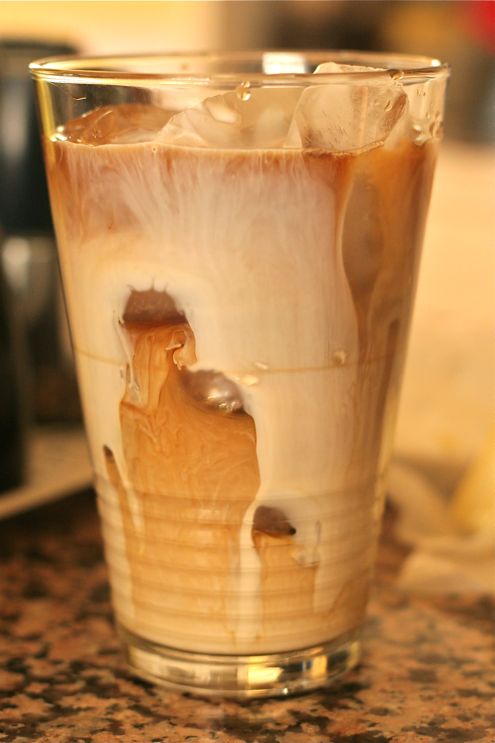
Is there anything more beautiful than half and half swirling into a tall glass of cold coffee on ice? Let me qualify that, is there anything more beautiful on a hot day in August?

I will now confess to something quite disgusting, although you will have to be the judge of whether it was as disgusting as what Laurie Colwin and her sister did (which was collecting all the leftover coffee from cups at the breakfast table and pouring that over ice). I think what I did was worse or maybe equally gross.

The other day, I made too much coffee for myself and a friend and I let it cool down on the counter for a future iced coffee and forgot about it for a few days…Then, driven by too much time with my cooped up, too hot children, I became desperate for iced coffee. Only instant gratification would do. I looked at the glass, and thought ew, for about 2 seconds, then shrugged and dumped in some ice cubes and a swirl of half and half. 10 minutes of unadulterated bliss – it was like a mini vacation. It should have been disgusting but, I have to report, it really was not.

I recommend making extra coffee in the morning to cool properly in a glass in the refrigerator to ice later. Usually I forget to do this and pour hot coffee over ice and then add the cream. Unfortunately hot coffee does not produce the best swirl of cream and coffee, which should be akin to Italian marbled endpapers, and which is intrinsic to the ultimate iced coffee experience. At least in my book. The appeal of the swirl is more than just aesthetic. With a good swirl, there are rivulets of cream and coffee throughout the glass. Sometimes you get a sip of pure coffee, sometimes mostly cream, then varying combinations of the two. It’s the most delicious thing.

Peach Crisp…for dinner?

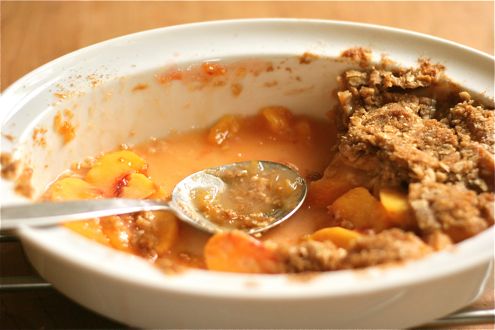
Just a thought. Because it’s August and you won’t get peaches like these for a whole year. Plus, your kid will never forget it – peach crisp for dinner is the kind of thing that could make for intensely fond memories of being a child. A hot lazy day, after some kind of summer camp involving…canoes? This sweet dinner in the back yard. Maybe in a hammock. Barefoot. A shallow bowl, warm peach juices mingling with the runny edges of slightly melted vanilla ice cream. Under the thick green summer canopy of a backyard tree, the sound of sprinklers. Ok, maybe I’m getting a little carried away, but you can see where I’m headed. I would definitely go for it. Peach crisp and a scoop of vanilla ice cream for dinner. And a glass of milk, you know, to make it healthy.

All you have to do is peel the peaches, slice them, toss them with small amounts of sugar, lemon juice and a little cornstarch, rub together the oatmeal topping and bake. There are no worrisome techniques to master (see pate sucrée), no finicky chilling of pastry, no sieving of custard. There is no need for fancy or hard to come by flavorings. No trip to the liquor store. Just fresh peaches and everything else is in the pantry.

Normally I only post a recipe once a week or so but it seems like this is sort of urgent. A peach emergency! Peach season will be over in a week or two!

Peach Crisp

  • 6-8 peaches (or 6 peaches and a small basket of raspberries for the most sublime thing ever)
  • 4 tbsp white sugar
  • 1 tbsp cornstarch
  • juice of half a lemon
  • 1/4 lb cold butter
  • 1 c. brown sugar
  • 3/4 c. flour
  • 3/4 c/ oatmeal
  • 1 tsp cinnamon
  • 1/2 tsp salt
  1. Preheat the oven to 350.
  2. Peel, pit and slice the peaches. I cut each peach into 12 pieces. Rinse raspberries, if using.
  3. In a medium bowl toss the peaches with the 4 tbsp sugar, cornstarch and lemon. Set aside.
  4. Cut the butter into 8 pieces and put into a large bowl or the bowl of a food processor.
  5. Add the brown sugar, flour, oatmeal, cinnamon and salt. Toss with the butter.
  6. Rub the butter into the dry ingredients with your fingers. The way to do this is to pinch a piece of flour coated butter and rub it between your fingers, pushing it through the dry ingredients until the mixture has a crumbly consistency and there are no more large pieces of butter. If you are using a a food processor, pulse until the largest piece of butter is the size of a pea. (not a tender tiny, one of the bigger kind)
  7. Put the fruit into a medium oval baking dish or an 8 x 8 pan. Pour 1/2 the crisp topping over the fruit, reserving the rest for a future crisp. It will keep in a sealed container for a couple of weeks in the refrigerator. Pat the topping gently over the fruit.
  8. Bake for 30-40 minutes or until the juices are bubbling around the edges of the pan.

And just because I say you should make this for dinner, please don’t let that stop you from making it for dessert. Truthfully, that’s what I usually do! Now I have to go set up my hammock. 

Rain in August = Pappa al Pomodoro

On my mobile telephone, I have this weather app so I can look up what the weather’s like in the cities that I’ve lived in. I love to see whether the weather is worse in Stockholm or Seattle, or if it’s raining in Paris or sultry and warm in Rome. For mid-August, it was awfully wet today here in Seattle. Not only wet, but grey and dark and cold. When I checked that weather app for Rome it showed five little shiny yellow circles for the next five days. It’s not really surprising.  88, 90, 92, 89, 88 – so not only sunny but nice and warm too.

As I stand at the kitchen counter chopping away, I think of sitting at table on the edge of the piazza, taking in the heat and the bustle of Rome, where the scent of exhaust and cigarettes mingles with the perfume of fresh tomatoes, sliced and drizzled with olive oil and sea salt on a wide white plate. Or a bowl of bread and tomato soup, served tepid, slicked with olive oil and strewn with basil leaves. (It’s strange – I usually hate the smell of dirty cars and cigarettes here, but in Rome, I loved it.) Those were some premium tomatoes and I’ve haven’t had anything close since we moved up here from California. I loved mopping up the juices with crusty bread and washing it down with a glass of wine as I watched the passeggiata. Now I find myself on a grey day stuck in my kitchen cooking for small children, with less than wonderful tomatoes and I have to wonder, how did this happen?! And it’s August! It’s not supposed to be rainy all the time is it? Of course we are getting tomatoes but they’re from California, Mexico and those Canadian ones they grow hydroponically. Knowing it’s 90 degrees in Rome is killing me. I could be sitting at the edge of the piazza eating something so simple and delicious. Thinking of all those ripe tomatoes in the outdoor market could easily make me cry.

There’s hope though, for dinner anyway. What would you think about making tomato and bread soup? I had this soup several times a week, living in Italy. I’m sure if you’ve never heard of it, it sounds weird. If you’ve ever followed any of my soup recipes though, you know I’m a big fan of the garlic and olive oil slicked toast raft in a wide bowl of soup. This is a bit different. You cook stale bread into a chunky garlicky tomato broth for half an hour, and what you end up with is a satiny-rustic adult-baby food. All of which sounds like too much contradiction to be comprehensible. You’ll just have to trust me. Pappa al Pomodoro will transport you to the edge of a piazza in Rome no matter where you are or what the weather is like. Even if the tomatoes are pallid and mealy, this soup will still be fantastic.

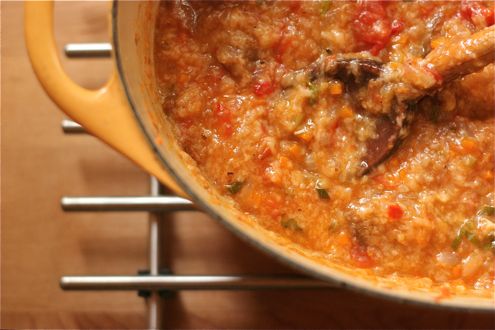
A bowl of pappa al pomodoro, a glass of wine, a crisp salad and the sound of rain falling heavily outside the open back door changed everything. Tonight, the weather felt like an event to celebrate as we ate our wide bowls of silky, bread-thickened, tomato perfumed soup to the sound of raindrops. Even if the tomatoes did come all the way from Mexico.

The finished soup

Pappa al Pomodoro

This soup takes no time to throw together and it uses only water no stock. Don’t be tempted to substitute chicken stock for the water – this soup manages to be deeply flavorful and rich without any stock.

  • 1 red onion, diced fine
  • 1 slender carrot, diced fine
  • 1 stalk of celery diced fine
  • 1 pinch red chili flakes
  • 1/2 c. olive oil
  • 4 cloves of garlic, roughly chopped
  • 1 1/2 lbs  Roma tomatoes, skinned and roughly chopped – I use a serrated swivel peeler – this must be the fastest way to peel them. Don’t use fancy heirloom varieties – they won’t be flavorful enough here – you’ll lose everything that makes them special. what you want is a dense paste tomato – like a Roma.
  • 1/2 a bunch of basil, in chiffonade
  • 1/2 pound of quite stale Italian style bread, in 1/2 inch slices (you can dry it out in a 200 oven for 2o minutes. It should be quite hard.)
  • 1 cup hot water
  • more extra virgin olive oil for drizzling, grated parmesan for dusting

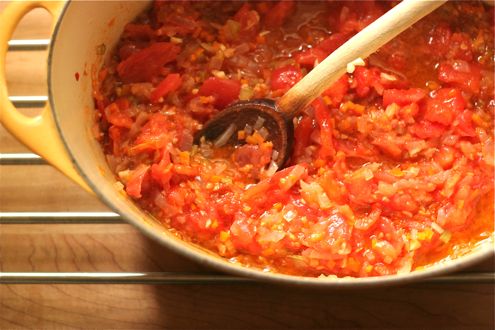
Chunky tomato broth

  1. Put the sliced stale bread in a large bowl and cover with cold water.
  2. Put the onion, carrots, celery, chili flakes and olive oil in a heavy 6 quart soup pot. Turn the heavy to medium and and stir until it sizzles gently. Turn down the heat and cover, cooking for 12 minutes, stirring a few times.
  3. Add the garlic and tomatoes, and stir, cooking for 5 more minutes.
  4. While the garlic and tomatoes cook down a little, drain the bread, discarding the water. Squeeze all the water out of the bread and crumble into the soup pot. Add the hot water and stir. Season with salt and pepper. Simmer over low heat for 25 minutes, stirring every few minutes
  5. Add the 2/3 of the basil and stir.
  6. Serve the soup garnished with the remaining basil in individual bowls.
  7. Pass the olive oil and parmesan at the table to season further.

Bread soaked in water

Just in time for August: Peach Custard Tart

I’m not going to sit here and pretend that making this tart is a snap or anything. It’s not. Pate Sucrée is a pain and I’m never sure if I’ve got it right. That being said, even when the pastry comes out funny looking, it never seems to make a difference – the custard holds everything together beautifully. And to miss out on this Peach Tart at the height of the peach season in a state known for their “Holy Sh-t” peaches, well, that would just be wrong. So pull up your socks and get to work. This one is absolutely worth it.

In this tart, the peaches crisp up under a delicate cloak of sugar and underneath are smooth and sweetly-tart. If you make the tart the day you plan to eat it (you must – this is not a dessert to make ahead of time) the custard will be so softly, almost breathtakingly set, and still you’ll be able to make beautiful neat slices. The creamy filling is on the verge of cascading over the crisp crust, just barely holding together, voluptuous and satiny. I scented the custard with St. Germaine, that elderflower liqueur I’m always going on about. The elderflower only enhanced the perfume of the peach, there was no alcoholic tang – nothing aggressive or distracting. This tart shouldn’t have a grown-up edge. The peach is the star here and the ripe fruit flavor sings.

Last summer, I made a version with nectarines which I thought at the time was the pinnacle of all summer stone fruit desserts- I would never have believed there was a better way. And now this. Sigh. The world is a beautiful place. Full of surprises.

Pate Sucrée

Even though the pastry looks pocked and unevenly browned, this has never posed any noticeable problem

I have to credit In the Sweet Kitchen by Regan Daley for this recipe – and SO many others. A truly excellent dessert resource. I never use anything else. Definitely this book is in my top three favorite cookbooks. And that includes all of them. Not just dessert!

Get all the ingredients measured out and in the freezer before you begin. You might even put the tart pan in there too.

  • (1) 11″loose bottom fluted tart pan
  • 1 7/8 c. all purpose flour
  • 3/4 c. confectioners’ sugar
  • 1/2 tsp salt
  • 12 tbsp very cold unsalted butter, cut into small pieces and chilled for 10 minutes in the freezer
  • 3 large egg yolks, lightly beaten, reserving one of the whites (you might need one more yolk but don’t crack it yet)

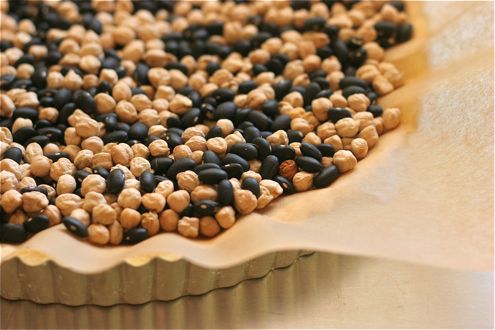
Dried beans make great pie weights

  1. In the food processor, whirl the flour, salt and confectioners’ sugar for a few seconds with the steel blade.
  2. Toss the cold butter evenly over the top and pulse until the largest pieces of butter are about a 1/4″. Don’t over process.
  3. Add the lightly beaten egg yolks, and pulse 2 or 3 more times. The mixture should look slightly moist and if you squeeze it, it should hold together in a clump. If it seems very dry and isn’t holding together, add one more lightly beaten egg yolk to the dough, pulsing briefly to distribute. (I had to add one last time – don’t let this make you feel like a failure.)
  4. Dump the dough into the tart pan and with lightly floured fingers press the dough evenly across the bottom and up the sides of the pan. You will have extra dough. The top of the dough ought to line up with the top edge of the pan and it should be no less than 1/4″ thick. The dough will shrink slightly as it bakes.
  5. Wrap the tart pan in plastic wrap and freeze for an hour, or let it rest in the refrigerator for 3-24 hours. Do not skip this crucial step. The dough needs to be chilled and well rested before it goes in the oven.
  6. Set the oven to 375.
  7. Prick the bottom of the tart shell about 20 times with the tines of a fork. I press my fingers against the dough when I pull the fork out or it crumbles.
  8. Line the bottom of the tart pan with parchment. Unintentionally, I bought silicone coated parchment last time, and I am glad. You can use regular old parchment or foil, but there is a danger of it sticking to the pastry when you remove it part way through the baking process. Top the parchment or foil with pie weights if you have them or do what I do: keep a stash of dried beans for the purpose.
  9. Bake for 15-20 minutes or until the edges of the pastry are becoming golden and the pastry bottom is looking cooked and a little dry.
  10. Carefully remove the parchment or foil and weights, and bake for another 10 minutes, until lightly browned all over.
  11. Set the oven to 325.
  12. Cool tart pastry on a rack for 15 minutes.
  13. Brush the tart with the reserved beaten egg white and bake for 3-5 minutes – just until the pastry looks dry.

Peach Custard Tart

  • (1) Pate Sucrée tart crust
  • 3-4 ripe peaches
  • 3 large egg yolks
  • 1/2 cup granulated sugar + 2 tbsp for dusting
  • 1 1/2 tbsp all-purpose flour (not a typo – you need very little flour here)
  • 1 c. heavy cream
  • 1 tbsp vanilla + 2 tbsp St. Germaine (or you could just use the seeds from one vanilla bean or barring that, 2 tsp regular old vanilla – this tart will be amazing no matter what)

  1. Preheat the oven to 325
  2. Wash and dry the peaches and peel them with a swivel vegetable peeler – the serrated ones for soft fruits work very very well! Halve the peaches by cutting all the way around, using the little natural seam as your guide. Gently twist the two sides to pull them apart and remove the stone in the center. Cut each half into 8 wedges. Arrange the sliced fruit in concentric circles around the tart crust, starting at the outer edge. Be prudent and don’t over fill. Leave room for the custard!
  3. Set tart pan on a rimmed cookie sheet. This will make it easier to put into the oven without spilling.
  4. Whisk the egg yolks in a small bowl. Slowly add the 1/2 cup of sugar, whisking as you go. Sift the flour over the eggs and sugar, and whisk again until very smooth. Add the cream and whisk some more – as you can see, smoothness is the idea here. Stir in the vanilla and St. Germaine or whatever flavoring you have chosen. Pour the custard over the peaches in the tart shell. Sprinkle evenly with the 2 tbsp of sugar.
  5. Bake the tart for 35-45 minutes, or until the custard in the middle is barely set – test by lightly touching the center with your finger. Place the tart pan on a wire rack on the counter until cool – at least 2 1/2 hours.
  6. Don’t count on having any leftovers for breakfast. You’re sure to be disappointed!

This Peach Tart was so delicious, I was sort of devastated when it was gone so quickly. Then I thought about it for a minute. I will just make another next weekend. Life, and peach season, is too short not to.

Mission Figs and Blue Castello

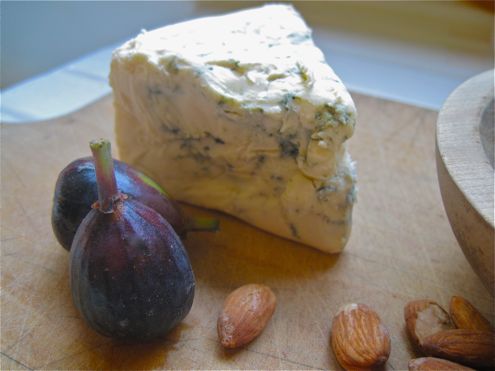
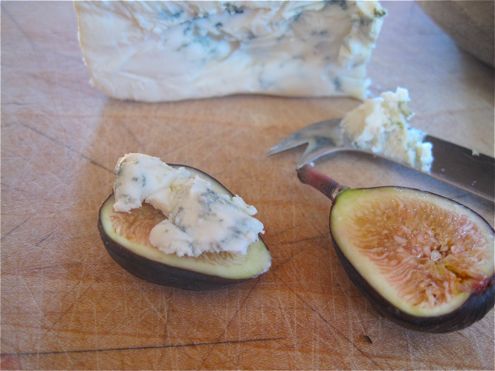
When we go on vacation, I’m always sure I’ll post at least something short at Notes on Dinner, but it never really works out that way. I took pictures on the trip though and now I have something very easy for August: figs and blue cheese for an appetizer, although it might also be dessert. Oozing creamy cheese shot with threads of sharp blue underscores the sweetness of black figs, sticky with juice. An old wooden board, a knife, a little glass of crisp mineral-y wine. It might seem off the cuff, even haphazard, but it’s not. This is laid back yet composed; some might even say elegant. (That might be me!)

I won’t call this a recipe and it seems silly to write it all out but here’s how it works:

  1. Buy a basket of Black Mission figs and a wedge of Blue Castello or a similarly rich mild blue.
  2. Rinse figs.
  3. Unwrap cheese.
  4. Get knife.
  5. Serve on a cutting board. I like to let people cut the figs and cheese themselves.

That’s it. The only little nicety you might add, if you get to the market in the morning, is to pull the cheese from the icebox an hour before you eat. You could also put a few almonds or walnuts out – they’d be even prettier served in the shell with a nut cracker.  We had a glass of chilly rosé with our figs, blue and almonds and that was just right.

Herb Garden

The other night my friend Tom was in town. I hadn’t seen him in 8 years. I’ve known him for 20. Which is staggering. How can we be so old?! We picked up right where we left off as if I’d seen him last week though.

For dinner, I had fingerling potatoes and spring onions. Tiny chioggia beets. A skirt steak. My standard arugula and shallots. I didn’t know exactly what I would do with them but these ingredients are so familiar to me. Dear like Tom in a way. And happily, I had loads of fresh herbs in the garden so I put them to work.

If you’re not growing sage, rosemary and thyme, you might want to think about getting some starts.  Yesterday my herb garden turned my sort of mundane ingredients into something to write about. Sauteed spring onions got a boost from English thyme and sage. Sage and rosemary perfumed the potatoes; the sage shatteringly crisp and glittering with sea salt. Rosemary and  thyme chopped fine scented the steak. What a big payoff for almost no extra effort!

As I put the dinner together while drinking chai with Tom, I made several trips outside to the herb garden, gathering sprigs of thyme, twigs of rosemary and silvery sage leaves. Later, we ate dinner in the garden, though it was barely warm enough for it. Tom wore his coat and I had to get a thick sweater. Still, there is something wonderful about cooking from the garden and then eating out there.

Fresh Herb and Garlic Rub for Steaks

  • 2 lbs skirt steak
  • 2 cloves garlic
  • 1/2 tsp kosher sea salt
  • a small handful of English thyme, rinsed and dried
  • a sprig of rosemary, rinsed and dried
  • freshly ground black pepper
  1. With a chef’s knife, chop the garlic and salt together until very finely minced. Add the thyme leaves and rosemary leaves and continue to chop until you have a rough paste. Add the black pepper. Rub all over the meat and leave on the counter until ready to grill (Ok, if it’s more than 1/2 an hour, you may want to refrigerate it!)
  2. When it’s time, brush the steak with olive oil and grill for 2-3 minutes per side over high heat. Let it sit uncovered and off the grill for 5 minutes. Slice and serve.


Roast Potatoes with Herbs from the Garden

  • 1lb fingerling potatoes, rinsed and dried
  • 1-2 tbsp olive oil
  • a small handful of safe leaves
  • (1) 4 inch sprig of rosemary
  • 1/2 a dozen cloves of garlic, unpeeled
  • sea salt and freshly ground black pepper to taste
  1. Preheat the oven to 400.
  2. Cut the potatoes in half lengthwise.
  3. Toss all ingredients together in a large baking dish where the potatoes fit in one layer without crowding.
  4. Roast the potatoes for 40 minutes, flipping them over half way through.
  5. If you are serving bread also, the soft roast garlic can be squeezed out onto the buttered bread.

Seared Purple Spring Onions

  • 1 bunch purple spring onions, rinsed and dried
  • 1 tbsp olive oil
  • small handful English thyme
  • 6 small sage leaves
  • sea salt and freshly ground black pepper to taste
  1. Quarter the spring onions.
  2. Heat a large heavy saute on medium high for 2 minutes
  3. Add olive oil to pan and then spring onions and thyme.
  4. Saute for 3-4 minutes on their cut sides until golden and crisp.
  5. Add sage leaves and turn down the heat for 2 minutes to allow the sage to scent the onions.
  6. Toss with the roast potatoes  – so beautiful!

I served the steak and potatoes and onions with beet salad – tiny roast chioggias this time – roast for 30 minutes at 400 degrees in their own roasting pan alongside the potatoes.

Summer and the Ultimate Sandwich

The Ultimate Sandwich

Whenever I ask my kids what they want for dinner, the knee-jerk response is always: “ultimatesummersandwich” as if it were just one word. It doesn’t even matter what season it is. For me too, in the summer at least, it’s the obvious choice. On a hot day sitting outside in the cool under the grape vines and eating this sandwich with a tall cold beer – that’s a perfect summer moment. On one of the many rainy evenings, I think, well, just because it’s wet doesn’t mean we have to eat stew or something – we’ll have the Ultimate Summer Sandwich! Even though we’re eating indoors, this sandwich is so delightful it makes dinner feel like the best kind of special occasion. (For me “special occasion” means something superdelicious – not necessarily fancy. This sandwich isn’t fancy.)

Here’s what I like about it: the warm spicy-sweet rubbed chicken, the cool creamy tang of goat cheese, the bitter curls of arugula, the richly floral tomato and basil pesto, the edgy bite of the red onion, the chewy baguette. All those contrasts and the whole thing hits just the right note! The sum is far greater than the parts.

If I made one Ultimate Sandwich an entire baguette long I think I could probably eat the whole thing. It’s that good.


Pesto ingredients

The Ultimate Sandwich

The recipe is from one of my very favorite cookbooks, which I may have mentioned before: Weber’s Big Book of Grilling. I can’t imagine cooking in the summertime without it.

  • 2 boneless skinless chicken breasts
  • 2 tbsp brown sugar
  • 1 tsp kosher salt
  • 1/8 tsp cayenne
  • 3 handfuls arugula
  • 4 ounces mild soft goat cheese
  • 1/2 a small red onion, thinly sliced
  • 1 long French baguette – not too chewy, not sour (I use La Brea)
  • 1 small garlic clove
  • 1 cup of fresh basil leaves
  • 3 tbsp olive oil
  • 3 tbsp sundried tomatoes packed in olive oil
  • 2 tbsp pine nuts
  • 1/4 cup grated parmesan
  • freshly ground black pepper
  1. Begin by mixing the brown sugar, salt and cayenne in a small bowl. Remove the tenders from the back of the chicken breasts. Lightly pound the thicker ends. Rub the brown sugar mixture all over the chicken, place in a dish and cover. If you are not going to continue with the rest of the recipe, refrigerate until it is time to grill.
  2. Remove the goat cheese from the refrigerator, unwrap and leave on the counter to soften.
  3. Wash and dry the arugula.
  4. Fill a small bowl with cold water and leave the red onion to soak – this will take away the lingering bite.
  5. Slice baguette into 4 equal pieces and cut almost all the way through lengthwise.
  6. To make the pesto, crush the garlic and place in the food processor with the basil, olive oil, sun-dried tomatoes, pine nuts and black pepper. Whirl until smooth. Transfer to a small bowl and fold in the parmesan.
  7. Heat the grill medium hot.  Pat the chicken dry with paper towels. Grill for 8-10 minutes turning half way through. Remove from grill and slice on the diagonal into 1/2″ thick slices.
  8. Spread baguette with goat cheese on one side and pesto on the other. Layer chicken, arugula and red onion inside. Serve at once.


More fun with beets

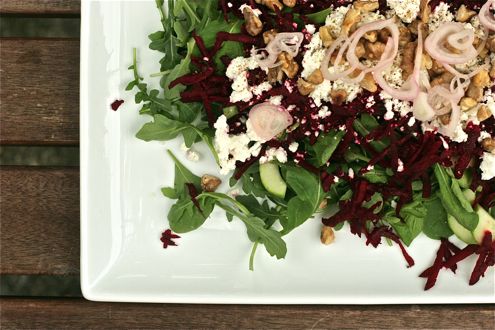
As if they weren’t already wonderful enough roasted and tossed into a salad! Those little beets you get in the summertime, red or chioggia, don’t need any cooking at all. All you have to do is peel them and grate them on a box grater. 2 small beets for 1 big salad – I use arugula or little gem for greens, cucumber, shallots, goat cheese, toasted walnuts. You can see how I made the first beet salad here. Just substitute grated raw beets for the cooked. Now that’s fast.

Summer with a twist – Rhubarb cocktails and gravad lax

It’s summer (sort of) here in the Pacific Northwest.  I’m going to keep this quick and offer Gravad Lax – home cured salmon – as an option for when you are tired of the grill.

For me this happens maybe once each summer – usually during a heat wave when it’s too hot to stand around flipping burgers in front of a red-hot pile of charcoal. Instead of singeing your eyebrows off in 90 degree heat by the Weber while your guests are sitting over there drinking cold beer, your dinner is already done, so you can be sitting in the sun with a beer too. You see, you salt the fish two days before you eat it, allowing it to cure in the refrigerator. About half an hour before you want to eat, pull the salmon from the cold of the fridge and shave the thinnest translucent slices possible from the fish. The salt will have pulled all the moisture out and the color will be vividly red. The cool salty-silky salmon is a welcome change from peppery charred filets you might expect on a hot June night. Even though it’s not exactly hot here in Seattle.

I like to imagine serving gravad lax in the long bright evenings you get in Stockholm at midsummer, but without the mosquitoes. We didn’t have mosquitoes last week but since this is Seattle in June, we had rain, rain, rain. No sultry summer evening in the garden for us! Still, we had a fantastic time with friends. With the salmon, we served rhubarb cocktails. I’m including both recipes. Happy summer!

The Stockholm – serves 1

  • 1/2 ounce aquavit
  • 1/2 ounce cointreau
  • 1 1/2 ounces rhubarb puree (recipe follows)
  • dash of orange bitters
  • Prosecco to top up
  • a piece of orange peel, cut wide with a sharp vegetable peeler

Rhubarb puree – makes enough for many cocktails

  • 4 stalks rhubarb, rinsed and sliced into 1/2″ slices
  • 3-4 tbsp sugar
  • juice of one lime

  1. Preheat the oven to 400.
  2. Toss all ingredients together in a small baking dish (for instance, an 8″x8″ square pan or a gratin). Cover tightly with aluminum foil.
  3. Bake in the oven for about 1/2 an hour until the fruit is completely soft.
  4. Push the rhubarb through a fine mesh sieve with a wooden spoon or, if you are feeling completely lazy, puree in the food processor. (if you opt for the food processor, the puree will be somewhat fibrous)
  5. Refrigerate until cold and proceed.

Assembling the cocktail:

  1. In a tall cold champagne flute stir together the aquavit, cointreau, rhubarb puree and the bitters.
  2. Top up with chilly Prosecco and float a wide piece of orange peel to finish.

This is now my favorite summer cocktail. That St. Germaine that I sometimes rave about would potentially be an excellent substitute for the Cointreau if you happen to have any lying around.

Gravad Lax – serves 6-8 as a generous appetizer

Allow 4 days to complete the recipe. Note that there is a total of 15 minutes  easy work though.

  • 2 pounds salmon (I used Copper River sockeye)
  • 2 teaspoons peppercorns (I used mixed), lightly crushed
  • 4 tablespoons kosher salt (not fancy kosher sea salt & not sea salt, just regular old kosher)
  • 2-4 tablespoons sugar (I used 3)
  • About a cup of rinsed, coarsely chopped dill
  • lemon wedges, finely minced onion, chopped chives, crème fraiche, cucumber slices, coarse sea salt, thinly sliced dark rye bread to serve

  1. Day 1-2: Freeze the salmon for 48 hours to kill any parasites.
  2. Day 3: First, cut the salmon fillet in half across the short dimension. If you pull any pin bones with needle nosed pliers, you will make slicing and serving a lot easier.
  3. Stir the peppercorns, salt and sugar together in a small bowl.
  4. In a rimmed baking dish (to catch any salt that doesn’t adhere) rub about a third of the salt mixture on the flesh side of each piece of salmon.
  5. Sandwich the salted fish, flesh sides together, with the rest of the salt mixture and the dill in the middle. The thick part of one piece should top the thin part of the other. Place in a gallon-sized Ziploc bag, carefully sealed, in the bottom of the refrigerator for 2 days. I would put the bag in a baking dish. Turn the bag a couple of times a day.
  6. Day 5: After 2 days, drain any liquid and scrape off the salt mixture and dill and place in the freezer for half an hour (you don’t HAVE to put it in the freezer but it sure makes slicing it very thin a lot easier)
  7. Gravad lax keeps for at least a week, drained of all the accumulated liquid, in the refrigerator. Well wrapped, it keeps for 3 months in the freezer.
  8. Serve with crème fraiche, chopped chives or minced red onion, lemon wedges, maybe a few cucumber slices and if you are feeling ambitious (I recommend this) some excellent homemade rye bread with fennel seeds. (If you haven’t tried rye without caraway seeds, you haven’t lived. You won’t be disappointed I promise – send me a comment if you want the recipe!) Otherwise some of those rye cocktail squares or German style pumpernickel would be fine.

I like to make a big platter with everything, piling up the gravad lax and all the condiments in heaps. Little teaspoons can scoop up the crème fraiche and onions. Everyone can build little sandwiches according to their own taste. A little bite of sandwich, a taste of the cocktail, and around it goes. What a nice party! A more organized person than I am would at least provide cocktail napkins. Oh well.

Dining Around Seattle: Halibut, Black Rice & Aioli

I don’t know what happened. Or rather, it happened so suddenly. Like exotic mushrooms suddenly sprouting up in the gloom of a damp, dark forest.

I have been nonplussed with the restaurants in Seattle since we moved here seven years ago. There was too much money in them – the interiors, the ingredients, the clientele. To me, they all looked like they were trying too hard. Now all of a sudden, there are so many restaurants to love – where did they all come from?! I probably missed them as I was raising little kids. Now that my three are a bit bigger I can pay attention to what’s going on out there.

It started last fall when I finally visited the Corson Building. Rustic, very rustic. I’m calling it run-down palazzo chic – whatever that means – with edgy neo-Northwest Mediterranean food. If you have a chance to go, you’ll see what I mean. Then, Sitka and Spruce in their latest incarnation on Melrose. Turn of the century, romantic industrial interiors with riffy Northwest-inflected, Middle Eastern food. That one might be my favorite. But then there’s Spur! Also local ingredients but with that sous-vide spin. It’s still forthright Northwest food though, because this is Seattle. And it totally works. Finally, I went to Revel for lunch on Monday and despite a dire (and I mean dire) dessert, the Korean-inflected meal straddled comfort food and spring seasonality and all I wanted was more, more, more! I think our waiter was stunned and (dare I say?) impressed with all that my friend Christine and I managed to eat.

Anyway, I love it in a restaurant when there’s this sense that the chef is throwing down the gauntlet, saying: Here is what I know about living here in this moist, dark part of the world and this is what I have to say about it. At Sitka and Spruce, for instance, the food hovers between the briny sea life of the Sound and the fertile plains of eastern Washington. I love the deliberate, thoughtful, local-ness of the ingredients, but it doesn’t stop there. The chef dallies with dukkah, with harissa, with stinging nettles and pickled lady fern. And that‘s the sweet spot for me. I get home from a dinner like that and I want to try making food that way; employing local ingredients and spinning them into another faraway culture. Even if it just means I’m barely more than copying. That’s okay with me.

A couple of months ago I wrote about that clam and black rice dish I tried to make from the menu at Sitka and Spruce. Instead of clams I used halibut, which was finally making it’s first appearance of the spring.  I wanted to write out how I did it, but I was intent on writing about aioli first. Well, I guess I made le Grand Aioli already so that recipe is already done. Now this dish will be supremely easy. Fifteen minutes of work; dinner on the table in less than an hour. Hooray.

Grilled halibut, black rice, aioli & cilantro

(inspired by the clams in a similar preparation at Sitka and Spruce)

  • 2 lbs halibut filet, skin removed by fish monger (halibut skin is notoriously difficult to remove)
  • kosher sea salt and freshly ground black pepper
  • 1 1/2 cups black rice
  • 3 cups water
  • 1 tbsp extra-virgin olive oil
  • 1 recipe aioli
  • 3 cups cilantro, washed and dried, with tough stems removed
  • 1 lemon, cut into wedges
  1. In a medium sized, heavy bottomed sauce pan, bring the water, rice and 1/2 tsp of salt to a boil. As soon as it reaches the boil, put on the lid, turn down the heat to low or until it just simmers . Set the timer for 50 minutes.
  2. Light the coals on your grill, or preheat a gas grill on high.
  3. Lightly season the halibut with sea salt and pepper and brush both sides with olive oil.
  4. When there  are just 10 minutes left on the rice, start to grill the halibut. With a thin metal spatula, carefully turn the fish after 4 or 5 minutes. If it falls apart, don’t worry! It will all get covered by the cilantro anyway. Grill for another 4-5 minutes. When fish is just opaque in the middle it is done. Remove to a clean plate.
  5. Give the rice a stir and then heap onto a large platter. With a spoon drizzle a few tablespoons of aioli over the rice. Lay the halibut fillets on top and drizzle over a few more tablespoons of the aioli.  Strew the cilantro over the top. Garnish with lemon.

Serve with a bunch of asparagus, tossed in olive oil, salt and pepper and grilled. Everyone will be happy. This dinner manages to be both effortless and complex. Halibut is so delicately rich in contrast with the darkly earthy rice. The cilantro and aioli were jewel-like in comparison. Even my fish-phobic 11 year old was begging for seconds.