Tag Archives: dessert

Birthday Cake

I’m trying to write about Leo’s birthday cake and what I’m finding is, I don’t really care about making cake as much as I used to.

However…this is such a great cake! So I’m sharing anyway. We all need a recipe as reliably lovely as this one. A  pure and plain expression of the ideal; the crumb sweetly, tenderly vanilla and so delicate. And still there is structure! Not many cakes strike that balance. Not only that, but a person who has baked nothing more than a brownie could easily whip this one out. I promise.

I know, I know. Too bad the frosting had to be blue. Not my choice.

What Leo said was “I want a white cake, vanilla, with blue frosting, also vanilla, covered with gum drops.”

I smiled at him, he’s so adorable, but I know this: he’ll take two bites, tops! No offense Leo. Food should not be blue. Not even cake. And hey! Are you really a vanilla/vanilla kid?! What’s with the gumdrops? Have you ever really eaten a gumdrop? Don’t you know they don’t taste very good?

It used to be that with birthday cakes, I would veer deeply into Martha territory but now that is in my past. I am finished with complicated. Plain and delicious is what I’m after. No fancy tricks or techniques. Who needs to prove they can make an Italian meringue or French buttercream? Not me. Kids like the butter and powdered sugar version better anyway and I want Leo to like his cake. Also, I want to like his cake. Like making it, like eating it. And this cake delivers all that.

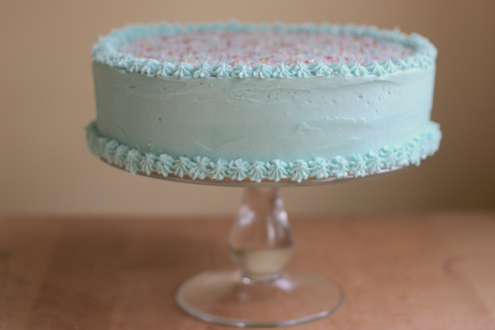
As I couldn’t handle the gumdrops, I substituted India Tree Sparkling Sugar Confetti  but I did dye the frosting blue, against my better judgement. And then I broke out a secret weapon: Lemon curd. Leo loves lemons but he’s never had lemon curd.

He totally loved his birthday cake – he even ate a whole slice! I loved it too. My favorite birthday cake in years.

Although…blue frosting?

The Essential White Cake

Pay attention to the temperature of the ingredients – all dairy and eggs should be at room temperature.

  • 2 1/4 c. cake flour
  • 1 c. whole milk, at room temperature
  • 6 large egg whites, at room temperature (save 4 of the yolk for the lemon curd)
  • 1 tbsp vanilla extract
  • 1 3/4 c. granulated sugar
  • 4 tsp. baking powder
  • 1 tsp. table salt
  • 12 tbsp unsalted butter (1 1/2 sticks), softened, this is best done by removing the butter from the fridge to the counter when you wake up in the morning
1. Set oven racks in upper-middle and lower-middle positions. Preheat oven to 350 degrees.
2. Spray two 9-inch round cake pans with nonstick cooking spray (I used olive oil as it’s all I had and it was fine) and line the bottoms with parchment rounds. Then, spray the rounds, and dust the pans with flour. Flip the pans over and tap them firmly over the sink to remove any excess flour.

3. Pour the milk, egg whites, and vanilla into 2-cup liquid measuring cup and mix with fork until blended.

4. In the bowl of an electric mixer, using the paddle attachment, mix cake flour, sugar, baking powder, and salt at slow speed.
5. Add butter; continue beating slowly until mixture looks like moist crumbs, with no floury streaks remaining.
6. Add all but 1/2 cup of milk mixture to the buttery crumbs and beat together at medium speed for 1 1/2 minutes. Add the rest of the milk mixture and beat  for 30 seconds. Stop mixer and scrape sides of bowl.
7. Beat at medium speed for 20 seconds longer. The batter will look slightly curdled.
8. Divide batter evenly between the two cake pans. With a rubber spatula, spread batter out evenly over the pans. Place pans on separate racks in staggered fashion to allow air to circulate. Bake  for 23-25 minutes. A thin skewer or toothpick poked into the center should come out clean.
9. Rest the cakes in pans for 3 minutes. Using a small sharp knife, loosen from sides of then invert onto wire racks. Reinvert onto additional wire racks.
10. Cool completely, at least 1 1/2 hours.
Lemon Curd
  • 4 egg yolks
  • 1/2 cup + 2 tbsp sugar
  • 3 fluid ounces of lemon juice
  • 4 tbsp soft unsalted butter
  • the zest of an unwaxed lemon, finely shredded with a microplane grater
1. In a stainless steel or enameled cast iron saucepan, whisk the egg yolks with the sugar until creamy and smoothly blended.
2. Stir in the sugar, lemon juice and butter.
3. Stir over medium low heat, until thickened, so that it thickly coats the back of a spoon – draw your finger through the curd to see if it can hold that line. It should still be pourable.
4. Do NOT boil the curd as then you will have made oddly sweet, lemon-y, scrambled eggs. As soon the mixture has thickened, pour through a fine strainer and press  through with your spoon.
5. Stir in the lemon zest and cool. The curd will thicken significantly upon cooling.
6. To fill a 9″ cake you will need  1 cup of the curd. But if I were you I would steal a couple of spoonfuls before filling the cake.
Easy American Buttercream
You could find a buttercream recipe in any book, they’re all about the same. However, you will have to decide how stiff you want the frosting. Add a lot of powdered sugar and the frosting will hold a stiff little star piped obsessively from your piping bag. (Old habits die hard I guess!) Next time, I’ll use less sugar for a swoopier and creamier frosting!  If you are looking for a tutorial on how to frost a cake, look no further than here. Building the dam was life cake changing!
  • 2 cups unsalted butter, softened at room temperature for at least 2 hours
  • 6-8 cups powdered sugar, please sift it!
  • 1/2 tsp salt, fine table salt – not kosher
  • 2 tbsp vanilla
  • 2-4 tbsp milk
  • food coloring (optional)
1. Beat the butter on medium speed with the paddle attachment until it’s broken down into glossy peaks.
2. Add three cups of the powdered sugar and carefully restart the mixer on low. (start quickly and you and your kitchen will be covered in sugar) Beat until all the sugar has been incorporated
3. Add the vanilla, salt and and milk, then increase the speed to medium and beat for 3 minutes. Add the food coloring, if using.
You can add more sugar if you want a stiff consistency, but in my opinion, you will end up with a powdery mouth-feel and it doesn’t taste as good. It’s your choice. I think the frosting stars around the edge of my cake wouldn’t have looked so prissy, if I’d used less powdered sugar…
Here are a few photos on assembling the cake:
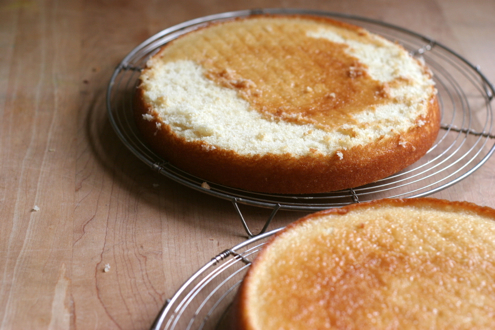
It looks sloppy before you frost, but leveling the cake is important
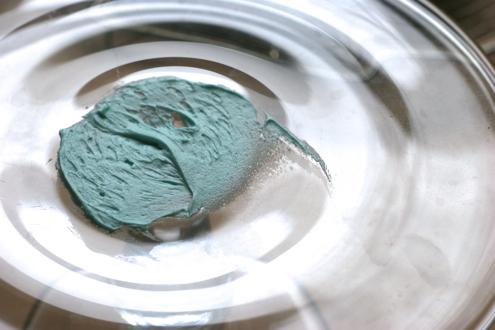
A tablespoon of frosting will help adhere the cake to the stand - no slipping!
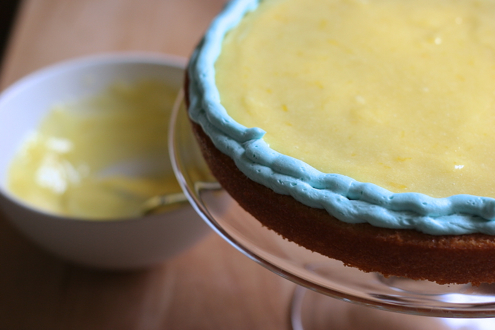
Why did I not know about the dam before now!?

The crumb coat - don't skip this step!
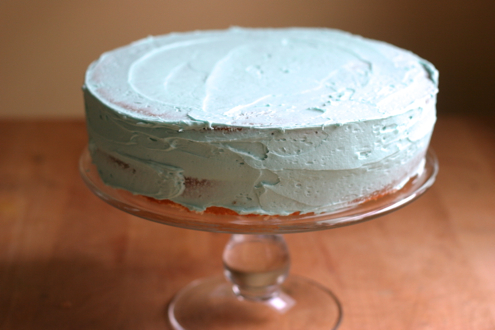
Crumbs contained
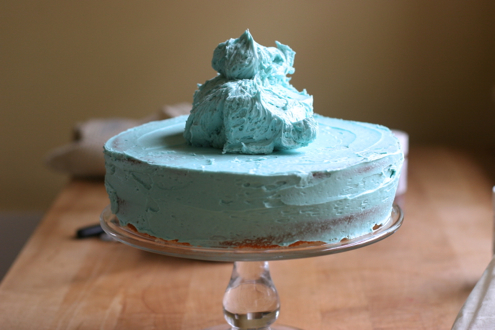
It sure seems like a lot of frosting
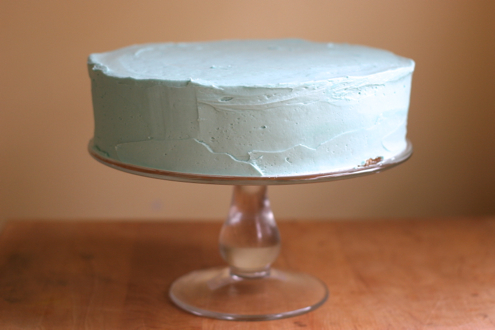
Smooth and ready for sprinkles
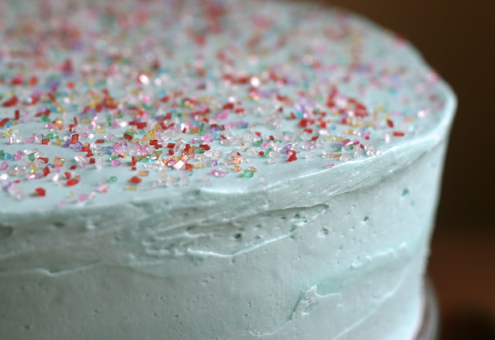
First sprinkles, then piping

Panna Cotta

This is my idea of the perfect dessert. It is elegant. It is understated. It is not too sweet. It isn’t dependent on the season and yet all kinds of seasonal fruit goes with it and that makes it versatile. From strawberries in June, plums in September, precisely cut little blood orange sections in December to rhubarb compote in March, they all marry beautifully with panna cotta. Plain, it is the essence of pure clean cream. It is ideal for dinner parties of up to 12 people because you must make it in advance so there is no last minute horsing around. Utterly creamy, it is the most beautiful pale ivory color, I am trying to think of a dessert I like better and I can’t. (Well, there is that roasted tangerine tart thing…and the pear custard with chocolate…oh and the fresh strawberry ice cream with brown sugar cookies. Nevermind.) Anyway. Panna Cotta is one of my supreme favorites and I can’t believe I haven’t written about it until now.

With rhubarb and strawberry compote

The first time I had panna cotta was in a dark cistern of a restaurant in Florence, following a wide soup plate of ribollita. A frutti di bosco puree swirled around the base. That one was good enough to start a bit of an obsession. For the next several years, if I saw panna cotta on the menu, I always ordered it for dessert. Sometimes it was dreamy, barely set, just sweetened cream, served with fruit or a tuile, or sometimes, weirdly, with chocolate. Occasionally there was too much gelatin and that was a disaster! Like rubber. Finally, in a little restaurant in the Mission in San Francisco, after a plate of very tender charred squid and a bowl of boar bolognese and tagliatelle, I had a panna cotta epiphany. Here on a little white plate, was the epitome of the the dessert. It’s highest manifestation. I’m only sort of kidding.

In a puddle of clear caramelized sugar, just burnt enough to be intriguing, a pale quiver of cream. Sections of blood orange were scattered at the edge; their membranes carefully sliced away. Luckily, SFGate published a recipe for the dessert soon after or I would still be pining for it here in Seattle.

I made this panna cotta on Monday for a dinner party I gave my dad as a present. I served it with a blueberry compote scented with lemon. (If you like to cook, it makes a great gift to give someone an entire dinner party. Loads of fun.)

Delfina Buttermilk Panna Cotta

Caramel

  • 1 1/4 cups sugar
  • Juice of 1/2 lemon
  • a little water + 1/4 cup of water
Panna Cotta
  • 1 envelope gelatin (about 1 tablespoon)
  • 3 cups whipping cream
  • 1 1/4 cups + 2 tablespoons sugar
  • 1 cup buttermilk
  • Juice of 2 lemons

Caramel - the color of an old penny

  1. To make the caramel: In a small heavy bottomed saucepan, combine the sugar and lemon juice.
  2. Add just enough water to moisten to a sandy texture.
  3. Using a pastry brush dipped in water, brush any sugar off the sides of the pot. This will help you avoid crystalizing the sugar. Don’t worry too much about this, I have accidentally crystalized sugar in other recipes, but never in this one.
  4. Cook over medium- high heat until the sugar caramelizes. The color should be as deep a copper as an old penny.  Getting the color right will ensure rich flavor. Just don’t burn it!
  5. Remove from heat and stand back while you add the 1/4 cup water. Don’t get spattered! The hot caramel will sputter like crazy when you add the water.
  6. When the sputtering stops, pour the caramel into a dozen little ramekins. Mine are 6 ounce and I got them at IKEA .Carefully tilt the cups to coat with caramel. Set aside.
  7. To make the custard: Empty the package of gelatin into a small bowl. Stir in 4 tbsp of water and stir. Set aside.
  8. Add the cream and sugar to a medium heavy bottomed saucepan and whisk. Heat until there are bubbles all around the edges but remove from the heat before it reaches a rolling boil. Stir in the softened gelatin and whisk until it dissolves completely. Add the buttermilk and lemon juice and whisk briefly until combined. Remove from heat and let cool.
  9. Pour the custard into the ramekins, over the caramel. Refrigerate overnight.
  10. To unmold:  Fill a small baking dish with very hot tap water. Working methodically, slip a small sharp paring knife around the inside of the molds to loosen the custards and set in the hot water for a about 10 seconds. Invert ramekin over a serving plate and whack it gently.  It should slide gently onto the plate, surrounded by a pool of caramel.
  11. Spoon a little blueberry compote around the edge.

Blueberry Compote

  • 2 cups blueberries, fresh or frozen if you must
  • 1/3-1/2 c. sugar (sometimes frozen berries are very tart)
  • grated zest from 1 lemon
  • 2 tbsp water (if using fresh berries)
  • 1 tsp. cornstarch
  • 2 tbsp lemon juice
  1. Stir the blueberries, sugar, lemon zest and water (if using) in a small saucepan. Heat until liquidy and the blueberries soften.
  2. In a small bowl, add the cornstarch to the lemon juice and stir until smooth. Scrape into the blueberry mixture. Stir and heat just until the berries reach a boil.
  3. Cool a little bit before serving. The contrast between the warm berries and the cool panna cotta is pleasing.

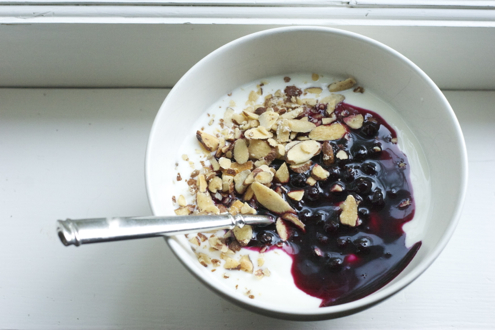
Leftover blueberry compote with yogurt and toasted almonds makes an excellent breakfast

I did have panna cotta last week at a sushi place here in Seattle. (Take note – this might be the best sushi I’ve ever had!) Anyway for dessert, they served Panna Cotta with a clear yuzu sauce. Fantastic.

Eggs: Lime Saffron Aioli, Champagne Sabayon and Duck Eggs. Not all at once, obviously.

Here are some true things about me and eggs.

  1. I had to eat an egg in some form every single day before school when I was growing up.
  2. We were a mayonnaise eating family, we made our own, and, we kept it on the counter for a week. (If there was any left. Often there wasn’t.) I could make mayonnaise by the time I was 10. In a blender. Mayonnaise is a raw egg based sauce – in case you aren’t familiar with how you make it.
  3. Deviled eggs are a particular weakness of mine and my sister’s. My uncle makes loads of them for the annual Christmas party and we park ourselves right by the tray and shamelessly pop them in our mouths until they are gone. You make deviled eggs with mayonnaise.
  4. One of the best desserts I ever had was at a little bistro in the Village in New York.  I can’t remember what was for dinner at all, but the warm sabayon with fresh tiny wild berries was like…I really hate to write stuff like angel’s nectar but there really is no other way to describe that ethereal nearly white cloud of beaten eggs and champagne. Of course I had to figure out how to make it at home.
  5. I find duck eggs to be delicious but a little bit freaky. They’re so huge.

I have been thinking about eggs a lot this weekend, as you might have guessed. Earlier this year, I wrote about Mary Alice and the amazing eggs she gets from Tender and  Nugget, her urban chickens. Well, on Friday morning she dropped by with a gorgeous basket of those eggs, a dozen, unwashed, just for me. And then, you’ll never believe this, my excellent neighbor Susan, went to the farmer’s market on Sunday and brought me half a dozen duck eggs.

Is there no end to my good fortune?!

This is what we made:

Sunday Night:

Lime and saffron aioli for grilled halibut with parsley, orange and shallot salad

Lemon Tart

Monday Night:

Poached duck eggs on toast with prosciutto, grilled asparagus, truffle oil butter and kosher sea salt (and yes I think the salt is important enough to mention)

Champagne Sabayon with Strawberries, Blueberries and Figs

I dream of dinners completed in half an hour and both the fish and the poached egg on toast fit the bill. And aren’t they so pretty? I’ve made the halibut before. I’ve made the poached egg before too. Poaching a duck egg is the same as a chicken egg – so that’s easy. Varying the halibut recipe is just adding a few ingredients to the mayonnaise recipe.

Lime Saffron Aioli

all ingredients should be at room temperature

  • 1 egg yolk
  • 2 tsp lime juice and the rind of the lime, removed with a rasp
  • 1/8 tsp kosher sea salt
  • 1 tsp hot water
  • 1 pinch of saffron
  • 1/2 small clove of garlic, grated
  • 3/4 cup mild oil, like canola


  1. Put the tsp of hot water in a tiny bowl with the saffron and leave to steep and cool. It’s such a small amount of water it will take no time.
  2. Whisk the egg yolk with the lime juice, salt, water and saffron and garlic until loose.
  3. Put the canola oil in a liquid measuring cup and as you whisk fiercely, drip the oil in very slowly, paying careful attention that it is completely incorporated before adding more. As the oil is incorporated, the mayonnaise should thicken into a silky looking sauce.
  4. As it thickens you can add the oil in a very thin stream, slightly faster than a drip.
  5. When all the oil is incorporated, the sauce should be glossy and supple and hold its shape softly when you dab at it with a spoon (Hopefully, you’re tasting your masterpiece!) Add the lime zest and taste for seasoning.

The parsley and orange salad is a cinch. Just use all the leaves from an entire bunch of parsley, the sections from two oranges carefully cut between the membranes and some of those thinly sliced shallots macerated in champagne vinegar. Add a little extra virgin olive oil, the reserved orange juice and some sea salt and you’re done.

Champagne Sabayon

Be careful to use a very large bowl for the double boiler. I should have used my large Pyrex mixing bowl. The sabayon foams up a lot – more than quadrupling its volume.

  • 4 egg yolks
  • 1/3 cup sugar
  • 3/4 cup champagne
  • 2 tbsp St. Germaine liqueur, optional
  1. Whisk the egg yolks and sugar together in the top of a double boiler set over boiling water.
  2. When the eggs and sugar are foamy, add the champagne. Whisk constantly for 10 minutes or use your electric hand mixer. That’s what I do.
  3. Remove from heat and stir in the St. Germaine.
  4. Serve warm in wide bowls with fresh beautifully ripe fruit.

I thought I would make this for the entire family for dessert but it turns out it tastes too “grown-up drink-ish” for kids. It didn’t matter. Martin and I piggishly ate almost the entire thing. I guess if I’m going to describe this as “angel’s nectar” I can say it was “heaven”.

I wonder what a deviled duck egg would taste like?! If I try one over the next few days I’ll let you know. I have three more.


After Christmas dinner comes plum pudding

As you might have guessed I’ve given Christmas Dinner a lot of thought. There have been culinary highs and lows. I’ve made far too much, too rich food. I’ve lost a lot of sleep. I’ve allowed my kids too much Christmas chocolate and suffered some mind-bogglingly bad behavior. Two years ago I had to spend the afternoon on Christmas day in bed, trying to catch-up on rest I was too wired to get the night before. A lost cause. I’d drunk too much coffee!

Figuring out how to have a nice day, a nice dinner and nicely behaved kids forces me to be reductive. I don’t want to spend the whole day in the kitchen. I want to play a board game, do a puzzle, get out of the house for some fresh air with the family and the dog. I want to make food that my kids will look forward to, that will thrill the grown-ups. If we want to be sure to have happy kids, this would not be the time for experimentation, even though my natural inclination is to try something new. Experimentation feels festive to me and I have to shelve that impulse. I have tried to create a tradition that isn’t bogged down by either trendy recipes that will quickly seem passé or uninspired renditions of the menus we had as kids.

After much trial and error I’ve finally arrived at what feels like the perfect Christmas meal. It has been a long haul. One year I prepared a slavishly Swedish smörgåsbord with smoked fish, ham, meatballs, lingonberries and all the trimmings. The next year I made a totally traditional British meal with a haunch of roast beef, billowing Yorkshire pudding, crisply roast potatoes and gravy—followed by plum pudding. Cooking such complicated heavy meals takes weeks of prep and planning and it gets boring. This led to exhaustion (me), bad behavior (my kids) and frustration (Martin). Then I had an illuminating conversation with my aunt.

The answer to my dinner conundrum turned out to be French dip sandwiches. Seriously. And no, they aren’t too pedestrian for the main event on Christmas Day. My aunt takes the French dip sandwich to a whole new level and yet she manages to keep the process easy so that her Christmas day is a relaxing one where she can enjoy her family and still have a meal that everyone looks forward to. She makes a standing rib roast for all of us on Christmas Eve and then, with leftovers, builds the most luxurious French dips the next day.

I can do this! I thought. So now I roast a beef tenderloin, which is a very easy thing to do on Christmas Eve, and slice it up the next day. I stir a little horseradish into some creme fraîche so it’s got a searing edge to it. I open a jar of cherry chutney that I buy at the store—that’s easy. I put par baked little French breads from La Brea into the oven; they are perfect with a crispy crust and an interior with just enough oomph that it doesn’t melt into the brothy dip. (Once I tried brioche rolls – a disaster! They disintegrated.) I butter the bread and layer it with piles of thinly sliced rosy beef. Wrapping the sandwiches in foil, I put them in the oven to make sure they get good and hot and move on to the salad. The beef broth for dipping is made the weekend before, and heated up just before serving.

With the sandwiches there will be a salad, a variation on the one that I made a few weeks ago, the failed salad. I’ve tweaked the recipe and now it works. The watercress gets a much milder blue cheese, blood oranges and candied walnuts. I kept the pickled currants and shallots and added juice from the blood orange to the vinaigrette. Now the salad is perfectly balanced. The colors are vibrant and very Christmas-y.

For starters we have smoked salmon on homemade Swedish rye bread with all the trimmings: minced red onion or chives, lemon, unsalted cultured butter, sea salt. With this you must serve champagne.

The one thing I couldn’t ditch was the plum pudding. And I’m going to tell you how to make it, even though I would put money on the fact that nobody who reads this will actually try making one. My grandfather faxed the recipe to me from England, transcribed from my grandmother’s “norse mutterings”, back in 1991. It really wouldn’t be Christmas dinner if I didn’t serve Granny’s Plum Pudding afterwards.

Christmas Menu

Smoked salmon, creme fraiche, minced red onion and lemon on Swedish rye bread with fennel seed and orange rind

French dip sandwiches with horseradish cream, sour cherry chutney and strong beef broth for dipping

Watercress salad with gorgonzola dolce, blood oranges, candied walnuts, quick pickled dried currants and shallots

Granny’s Plum Pudding and Hard Sauce

Plum Pudding  

You can make this weeks in advance of Christmas. It will only improve with age.

  • 3/4 cups softened butter
  • 2 cups soft bread crumbs from white bread
  • 1 tsp pumpkin pie spice
  • 1/2 tsp ground nutmeg
  • 2 tsp cinnamon
  • 1 cup flour
  • 1 cup brown sugar
  • 3 cups dried currants
  • 1 1/2 cups raisins
  • 1 1/2 cups golden raisins
  • 1/2 cup candied citron or orange peel or a mixture of both – chopped
  • 1/4 cup dried cherries
  • 1/2 cup chopped blanched almonds
  • 1 large cooking apple, grated
  • 3 eggs
  • the zest of one orange and one lemon
  • 3/4 cup sherry—or “any booze you have”; some people like Guinness for this. Others, ginger beer.

Stir all the ingredients together until well combined. Pack into a buttered pudding basin and steam in a soup pot for 6 hours. You do this by sealing the pudding basin and placing on a stainless steel vegetable steamer. Fill the pot with water so that it comes a quarter way up the sides of the pudding basin. After six hours let it rest uncovered on the counter until it is cool. Store in the refrigerator for weeks if necessary and reheat in a steamer on the stove. This seems to take about 2 hours. All this cooking will not hurt the pudding in any way.

Martin says that Plum Pudding is really just a vehicle for the following hard sauce and I understand what he is saying up to a point. In my opinion, you do need to serve Plum Pudding with some sort of sauce. We like Hard Sauce. Some people serve it with a sickly rum creme anglaise kind of thing but I don’t approve of that.

Hard Sauce

  • 3/4 cup softened unsalted butter
  • 1 1/4 cups soft brown sugar
  • 3 tbsp brandy

Cream the butter and then add the sugar. A hand mixer or food processor will make this very quick. Then add the brandy and process until smooth. Taste it; you may want more brandy. Put the hard sauce in the refrigerator to chill. I like this lethally strong as the contrast of the boozy sauce melting over the the mindbendingly rich and steamy pudding is so completely diverting.

It would be very much in the spirit of the Christmas season to have a not-too-small piece heated up in the microwave the morning after with a spoonful of Hard Sauce. Eat it in bed before the kids have woken up with a cup of strong Indian tea with milk on the bedside table, while reading one of the books you unwrapped the day before.

That’s what I would do.

Pie Crust – just make your own

The simple pleasure of making your own pie crust should not be underestimated

Until this morning, you might have said my approach to pie crust was a little fraught. I fussed and worried, wildly flip-flopping allegiances from the practical and traditional Joy of Cooking to the fantastically overwrought Cook’s Illustrated. (Although I have to say, the Cook’s vodka pie crust recipe is pretty impressive. I love the science of the alcohol as a replacement for water. Such brilliant and subversive fun!) I could never settle on MY piecrust though, and shouldn’t one be able to have a single recipe to use every time? One of the best things my mom makes is piecrust and if you watched her make one, you’d never guess how perfect it is. She uses no gimmicky trick in making her all butter crust. And it is perfectly flakey. My mother credits the lemon juice but I say she handles the dough in a way that I just haven’t been able to figure out. Anyway, after my experience last week,  I think I’m onto something.

I was thinking about piecrust with regard to quiche because my kids are suddenly obsessed by quiche, less for its gustatory pleasures than literary. (My kids read the Bone graphic novel series so they’re wildly into quiche right now.) I reached into the bookshelf for Mastering the Art of French Cooking – who would know better than Ms. Child about the best quiche method? Suddenly, I knew I was on a mission and actually it wasn’t quiche that was calling to me but crust. After a recent bad experience (confession alert!) with a frozen Trader Joe’s pie crust I was determined to just do it myself, and speedily without over-thinking. I was going to try the Julia method! (Just to put this craziness into context – this is minutes before I had to leave for the school bus!) I started rummaging around for the ingredients like a madwoman, yelling to the kids to “Get your coats and lunch boxes and wait by the front door with the dog! I’ll just be a few minutes!”

Weirdly, there was no fussing around. Even though Julia Child has a reputation for being complicated, her pâte brisée recipe turned out to be the pie crust I was looking for. In just 15 minutes, far less time than it takes to defrost a frozen pie crust, you can easily make one from scratch. You probably won’t even have to go to the grocery store.

Ms. Child does not use any wacky ingredients (i.e. vodka). What she details is a technique that was new to me. Fraisage. Nobody ever talked about fraisage in any of the other recipes. Combine the technique with a trusty food processor and all of a sudden a once dreaded pie crust is a thing to whip up in a few stolen moments before the school bus arrives. The dough turned out silky, pliable and it was a breeze to roll out. The baked crust was refined and flaky, unlike my previous crust work which, although flaky, had a sort of homely brutishness, stemming from a fear of over-handling the dough. If you are fearful, you’ll never fully amalgamate the butter with the flour and the pockets of butter embedded in the dough will be enormous, causing shrinkage and a blobbish crimped edge. With Ms Child’s method, the fat is perfectly united with the flour, creating those little melty steam pockets to make perfect flakiness. In addition, this dough will not shrink disturbingly.

Fraisage sounds like a complicated technique you’d have to apprentice yourself to a patissier in France to learn, but it’s not. I figured it out in fifteen minutes between throwing the breakfast dishes in the dishwasher and running the kids out to the bus stop, so obviously you’ll be able to. Unless you are a deeply inexperienced baker I would think you will not need a dry run for this recipe. Please make your own pie crust. We need to preserve our cooking culture! Pie bakers unite! Just say “No!” to vile, palm oil sullied, industrial crusts!

Pâte Brisée – for one double crust pie

  • 2 1/2 c. flour
  • 1 tsp salt
  • 1 tbsp sugar
  • 1 cup unsalted butter, very cold, cut into 1/2 inch cubes. (I cut them, put them on a plate and put them in the freezer until I’m ready)
  • 1/2 cup + 4 tbsp ice water) and perhaps a little more

Blending dry ingredients

Combine the dry ingredients in the bowl of your food processor and pulse a few times to fully combine.

Butter - in 1/2" cubes

Distribute the butter over the flour evenly

Add the butter, distributing it evenly over the flour mixture. Pulse 4 or 5 times. Now you have to be very quick. With the machine on, add a half cup of water all at once. Then quickly turn it off. Pulse 5-7 more times.

Curd-like crumbles show the dough is done with the food processor

The dough should look like dry curds, if not, add small amounts of ice water (by the tablespoon, no more), to the dough, pulsing carefully. When it looks like the photo above, on to fraisage!

Just before fraisage

Lightly flour an area on your counter where you can manipulate the dough. You’ll need a clear clean 18″ square area. Place the dough on the counter.

Pushing the dough away with the heel of my hand

Using the heel of your hand (your palm will be too warm and start to melt the butter) quickly press down and away from you, small amounts of the dough, smearing it out about 6 inches. This smearing is the fraisage.

Using a dough scraper or a stiff spatula, pull all the dough together and knead it (not too much) into a smooth-ish round ball.

Dough divided in equal halves

Divide it into two equal halves, dust lightly with flour, flatten into disks and wrap with plastic.

Ready to rest

Now the dough has to rest. Do not imagine that you can just skip this part. (Which is what I used to do.) Put it in the freezer for an hour or the refrigerator for at least two hours or up to 3 days. It can be frozen for weeks and defrosted in the refrigerator. If it is too hard to roll out, bash it hard with your rolling pin. You can then knead it quickly into a flat disk, ready to roll out.

Lightly flour the dough and roll it out into a circle, firmly but gently, always rolling away from you. Periodically, you might want to run a thin flexible knife or offset spatula underneath to ensure the dough hasn’t stuck to the counter.

Roll the dough until 1/8″ thick. Using your rolling pin to support it, carefully drape the dough over the pie pan.

Repeat with the other circle.

Fill with apples, berries or whatever your heart desires. (In case you are wondering what I’m doing, it’s apple. Send a note to comments if you need directions for fillings! I am always happy to help.)

Happy Thanksgiving!

P.S. When my pie is finished, late morning on Thanksgiving, I will definitely post a picture!

Summer swan song: my final peach dessert of 2011

After this one last dessert recipe, I promise to get back to notes on dinner.

If you always wanted to make a fancy looking French-y style tart but were afraid to, this would be the perfect place to start.

I’m not too sure what’s going to happen when peach season is over. I will be bereft and unable to write about anything, probably. Until it is utterly and officially gone though, I will be making this gorgeous peach tart. You should too. I don’t think I’m overstating it if I say it’s shockingly easy. You mix the crust with a fork – there’s no butter to rub into the flour! Then push the dough into a tart pan with your fingertips – there’s no pastry to roll out carefully and trim! Ms. Amanda Hesser over at Food 52 doesn’t peel her peaches but I have this nifty soft fruit peeler and we are having a little fling so I’m always looking for excuses to use it. It looks like this:

Soft fruit peeler

You have to decide what works for you but I do like a peeled peach. Or a nectarine. This tart would possibly be very nice with plums. Or peaches scattered with raspberries…You can and should play with this recipe – it’s fun.

Last week I substituted brown sugar for the white in the mix on top, and some oatmeal for the flour. Next time I might scatter a few sliced almonds on top  – they would complement the almond extract in the crust nicely. But you can leave the recipe alone if you want. It’s quite perfect as written. I was afraid the topping would be too sugar-y. I worried I would take a dim view of the olive oil crust – that it would be oily and too pungent. I was wrong, wrong, wrong.

Celebrate the end of the first week of school, or the last sunny weekend of the summer (or my birthday!) by making this tart. You’d better hurry up. Peach season won’t last forever.

And do whip some cream softly to serve with it, please.

Check out the gorgeous crisp crust

You can find the recipe here, at Food 52.

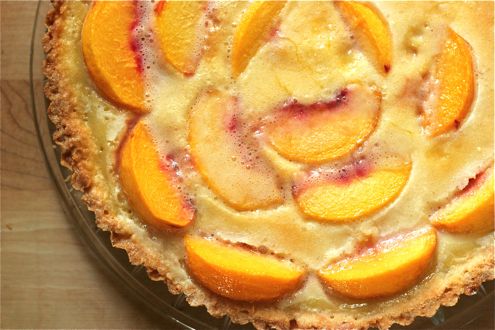
Just in time for August: Peach Custard Tart

I’m not going to sit here and pretend that making this tart is a snap or anything. It’s not. Pate Sucrée is a pain and I’m never sure if I’ve got it right. That being said, even when the pastry comes out funny looking, it never seems to make a difference – the custard holds everything together beautifully. And to miss out on this Peach Tart at the height of the peach season in a state known for their “Holy Sh-t” peaches, well, that would just be wrong. So pull up your socks and get to work. This one is absolutely worth it.

In this tart, the peaches crisp up under a delicate cloak of sugar and underneath are smooth and sweetly-tart. If you make the tart the day you plan to eat it (you must – this is not a dessert to make ahead of time) the custard will be so softly, almost breathtakingly set, and still you’ll be able to make beautiful neat slices. The creamy filling is on the verge of cascading over the crisp crust, just barely holding together, voluptuous and satiny. I scented the custard with St. Germaine, that elderflower liqueur I’m always going on about. The elderflower only enhanced the perfume of the peach, there was no alcoholic tang – nothing aggressive or distracting. This tart shouldn’t have a grown-up edge. The peach is the star here and the ripe fruit flavor sings.

Last summer, I made a version with nectarines which I thought at the time was the pinnacle of all summer stone fruit desserts- I would never have believed there was a better way. And now this. Sigh. The world is a beautiful place. Full of surprises.

Pate Sucrée

Even though the pastry looks pocked and unevenly browned, this has never posed any noticeable problem

I have to credit In the Sweet Kitchen by Regan Daley for this recipe – and SO many others. A truly excellent dessert resource. I never use anything else. Definitely this book is in my top three favorite cookbooks. And that includes all of them. Not just dessert!

Get all the ingredients measured out and in the freezer before you begin. You might even put the tart pan in there too.

  • (1) 11″loose bottom fluted tart pan
  • 1 7/8 c. all purpose flour
  • 3/4 c. confectioners’ sugar
  • 1/2 tsp salt
  • 12 tbsp very cold unsalted butter, cut into small pieces and chilled for 10 minutes in the freezer
  • 3 large egg yolks, lightly beaten, reserving one of the whites (you might need one more yolk but don’t crack it yet)

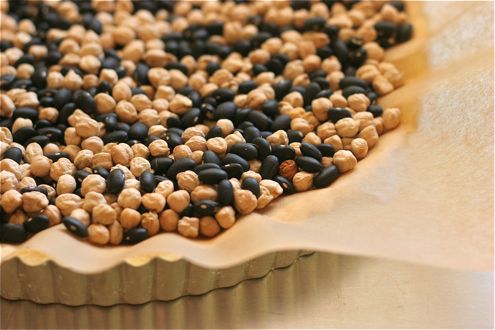
Dried beans make great pie weights

  1. In the food processor, whirl the flour, salt and confectioners’ sugar for a few seconds with the steel blade.
  2. Toss the cold butter evenly over the top and pulse until the largest pieces of butter are about a 1/4″. Don’t over process.
  3. Add the lightly beaten egg yolks, and pulse 2 or 3 more times. The mixture should look slightly moist and if you squeeze it, it should hold together in a clump. If it seems very dry and isn’t holding together, add one more lightly beaten egg yolk to the dough, pulsing briefly to distribute. (I had to add one last time – don’t let this make you feel like a failure.)
  4. Dump the dough into the tart pan and with lightly floured fingers press the dough evenly across the bottom and up the sides of the pan. You will have extra dough. The top of the dough ought to line up with the top edge of the pan and it should be no less than 1/4″ thick. The dough will shrink slightly as it bakes.
  5. Wrap the tart pan in plastic wrap and freeze for an hour, or let it rest in the refrigerator for 3-24 hours. Do not skip this crucial step. The dough needs to be chilled and well rested before it goes in the oven.
  6. Set the oven to 375.
  7. Prick the bottom of the tart shell about 20 times with the tines of a fork. I press my fingers against the dough when I pull the fork out or it crumbles.
  8. Line the bottom of the tart pan with parchment. Unintentionally, I bought silicone coated parchment last time, and I am glad. You can use regular old parchment or foil, but there is a danger of it sticking to the pastry when you remove it part way through the baking process. Top the parchment or foil with pie weights if you have them or do what I do: keep a stash of dried beans for the purpose.
  9. Bake for 15-20 minutes or until the edges of the pastry are becoming golden and the pastry bottom is looking cooked and a little dry.
  10. Carefully remove the parchment or foil and weights, and bake for another 10 minutes, until lightly browned all over.
  11. Set the oven to 325.
  12. Cool tart pastry on a rack for 15 minutes.
  13. Brush the tart with the reserved beaten egg white and bake for 3-5 minutes – just until the pastry looks dry.

Peach Custard Tart

  • (1) Pate Sucrée tart crust
  • 3-4 ripe peaches
  • 3 large egg yolks
  • 1/2 cup granulated sugar + 2 tbsp for dusting
  • 1 1/2 tbsp all-purpose flour (not a typo – you need very little flour here)
  • 1 c. heavy cream
  • 1 tbsp vanilla + 2 tbsp St. Germaine (or you could just use the seeds from one vanilla bean or barring that, 2 tsp regular old vanilla – this tart will be amazing no matter what)

  1. Preheat the oven to 325
  2. Wash and dry the peaches and peel them with a swivel vegetable peeler – the serrated ones for soft fruits work very very well! Halve the peaches by cutting all the way around, using the little natural seam as your guide. Gently twist the two sides to pull them apart and remove the stone in the center. Cut each half into 8 wedges. Arrange the sliced fruit in concentric circles around the tart crust, starting at the outer edge. Be prudent and don’t over fill. Leave room for the custard!
  3. Set tart pan on a rimmed cookie sheet. This will make it easier to put into the oven without spilling.
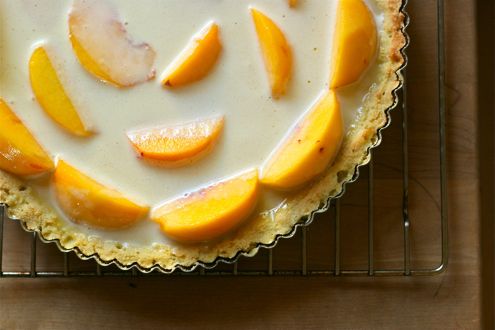
  4. Whisk the egg yolks in a small bowl. Slowly add the 1/2 cup of sugar, whisking as you go. Sift the flour over the eggs and sugar, and whisk again until very smooth. Add the cream and whisk some more – as you can see, smoothness is the idea here. Stir in the vanilla and St. Germaine or whatever flavoring you have chosen. Pour the custard over the peaches in the tart shell. Sprinkle evenly with the 2 tbsp of sugar.
  5. Bake the tart for 35-45 minutes, or until the custard in the middle is barely set – test by lightly touching the center with your finger. Place the tart pan on a wire rack on the counter until cool – at least 2 1/2 hours.
  6. Don’t count on having any leftovers for breakfast. You’re sure to be disappointed!

This Peach Tart was so delicious, I was sort of devastated when it was gone so quickly. Then I thought about it for a minute. I will just make another next weekend. Life, and peach season, is too short not to.